#82315 - FB Business Manager ID Setup
Objective
- Create a Business Manager Account in order to manage your different types of Facebook accounts.
Audience
- Client
Prerequisite
- You must have a personal Facebook Account
- You must own a Facebook Page
Part 1 - Facebook Personal Account Security Setup
First of all, you have to complete the Security Settings for your Facebook Personal Account in order to avoid this account getting blocked by Facebook. And there are three Security settings you have to complete before the Facebook Business Manager ID creation:
- Trusted Contacts Setup
- Login Activities Checkup
- Two-Factor Authentication Setup
Step-By-Step Guideline
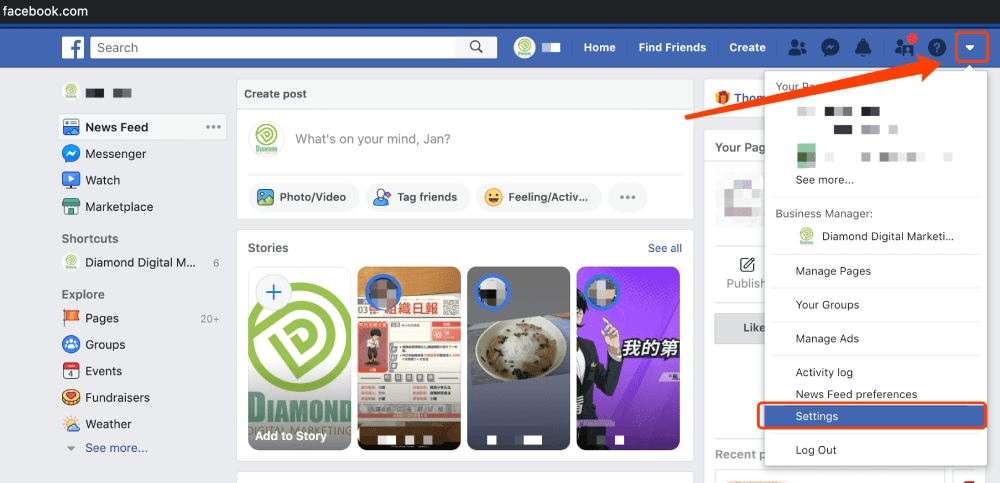
1a. Go to www.facebook.com and login to your Personal Facebook Account
b. Open the Menu in the upper right corner
c. Select [ Settings ]
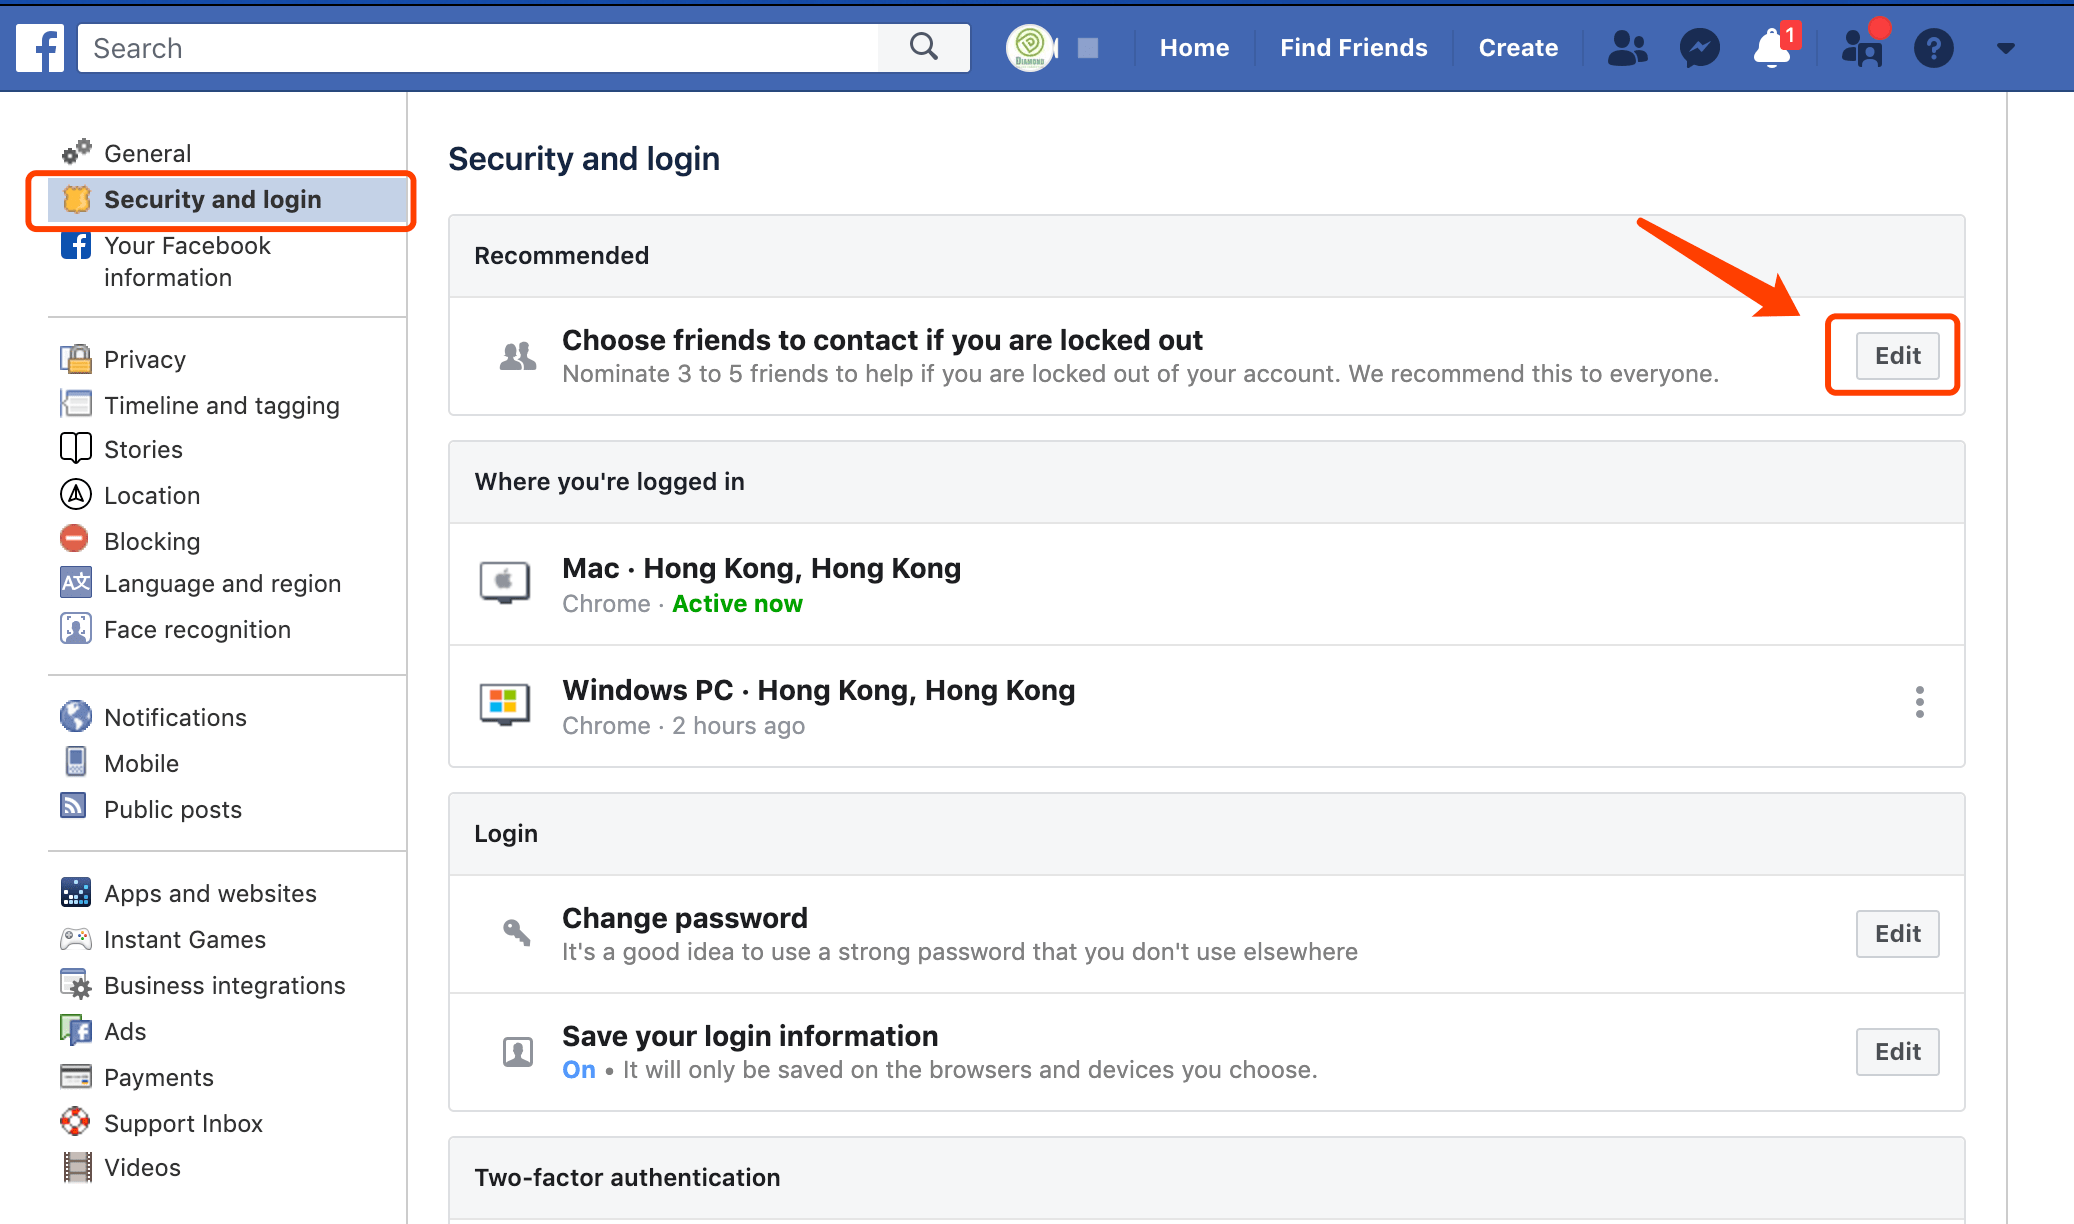
2. In Settings, go to [ Security and Login ]
a. Under Recommended > Choose Friends to contact if you are locked out
b. Select [ Edit ]
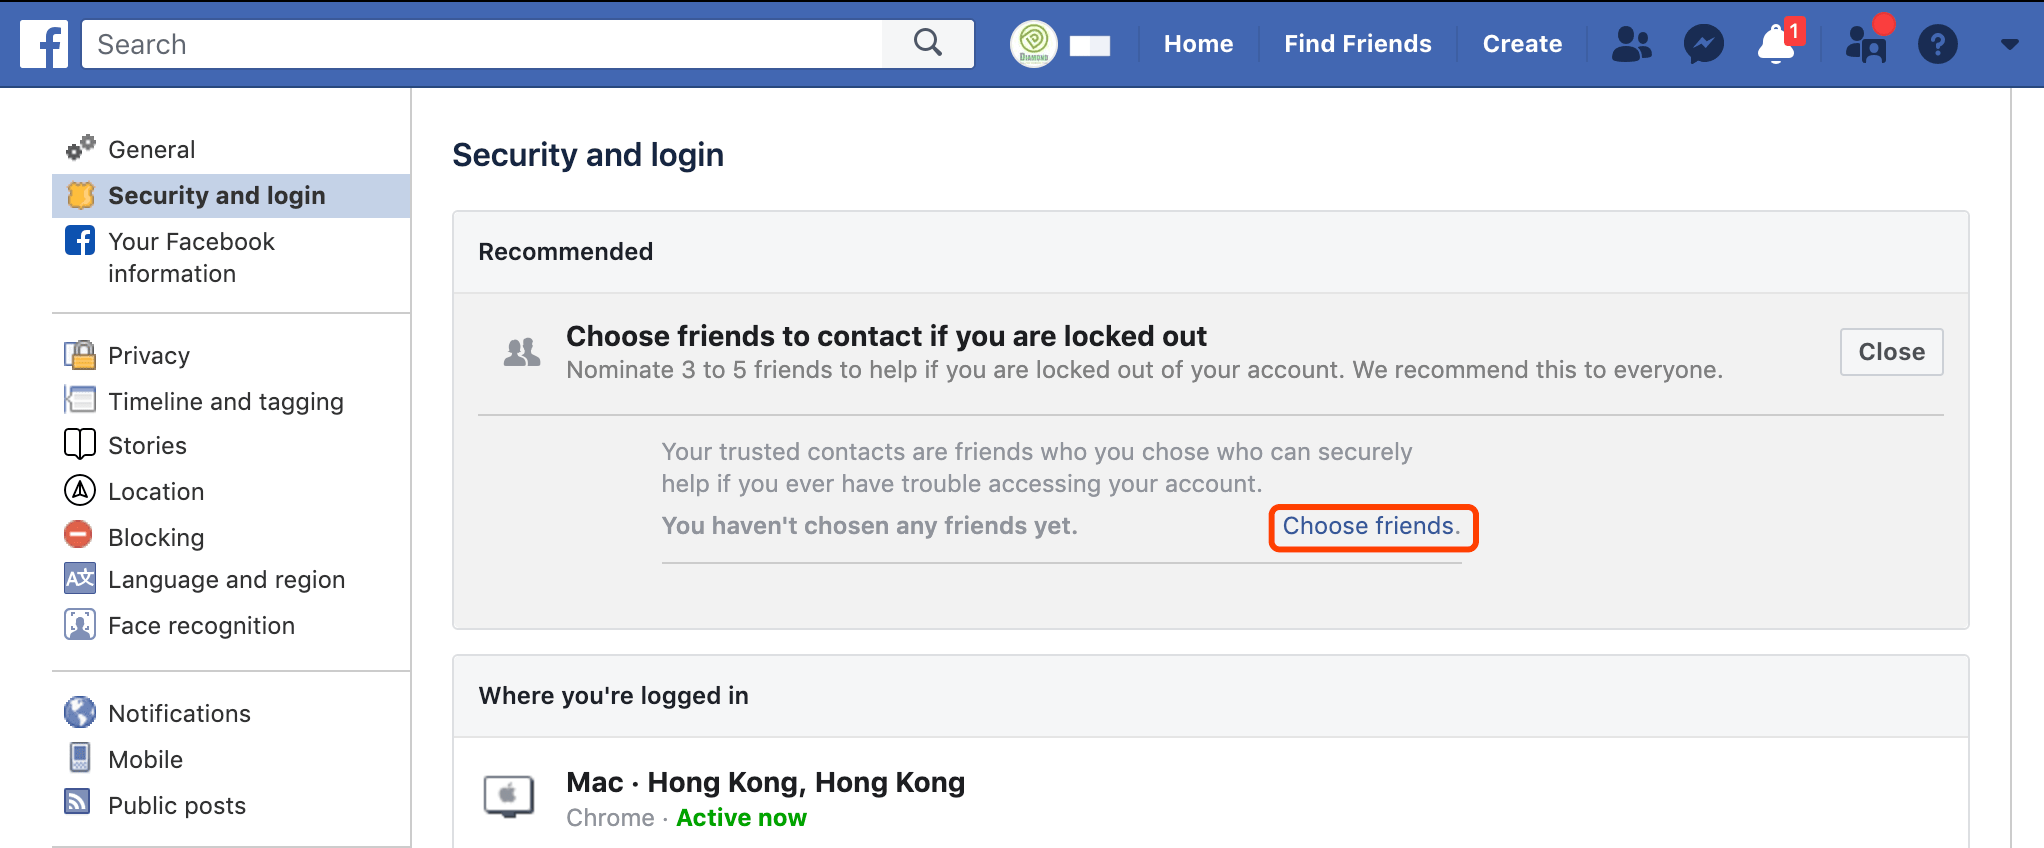
3. [ Choose Friends ]
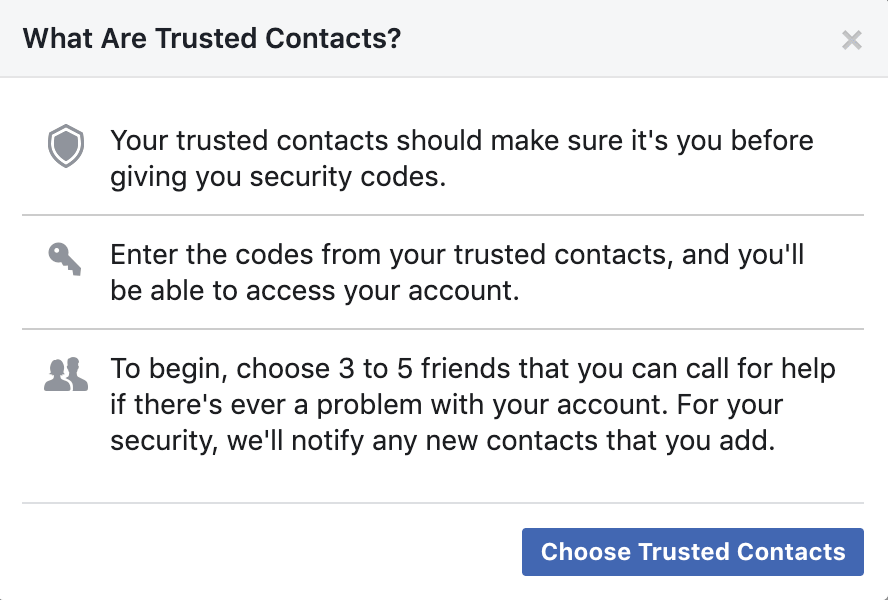
4. [ Choose Trusted Contacts ]
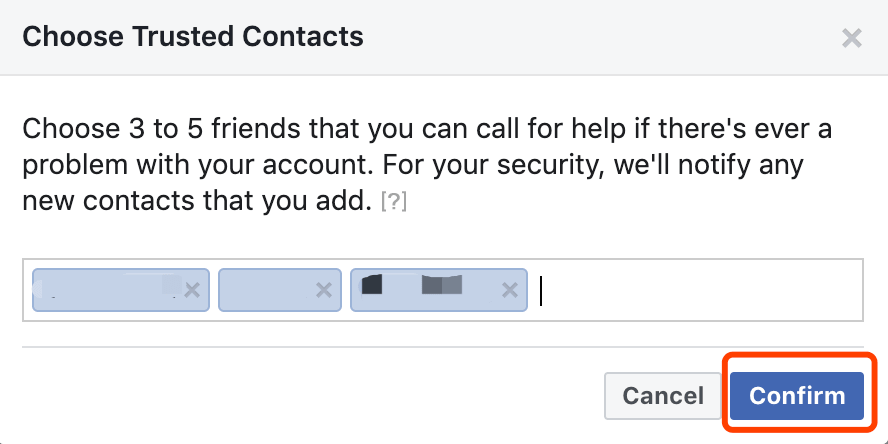
5. Make sure that the Trusted Contacts you have chosen is a real person( means that it’s not a dummy account) and you can call them for help if there is a problem with your Facebook Personal Account
a. [ Confirm ]
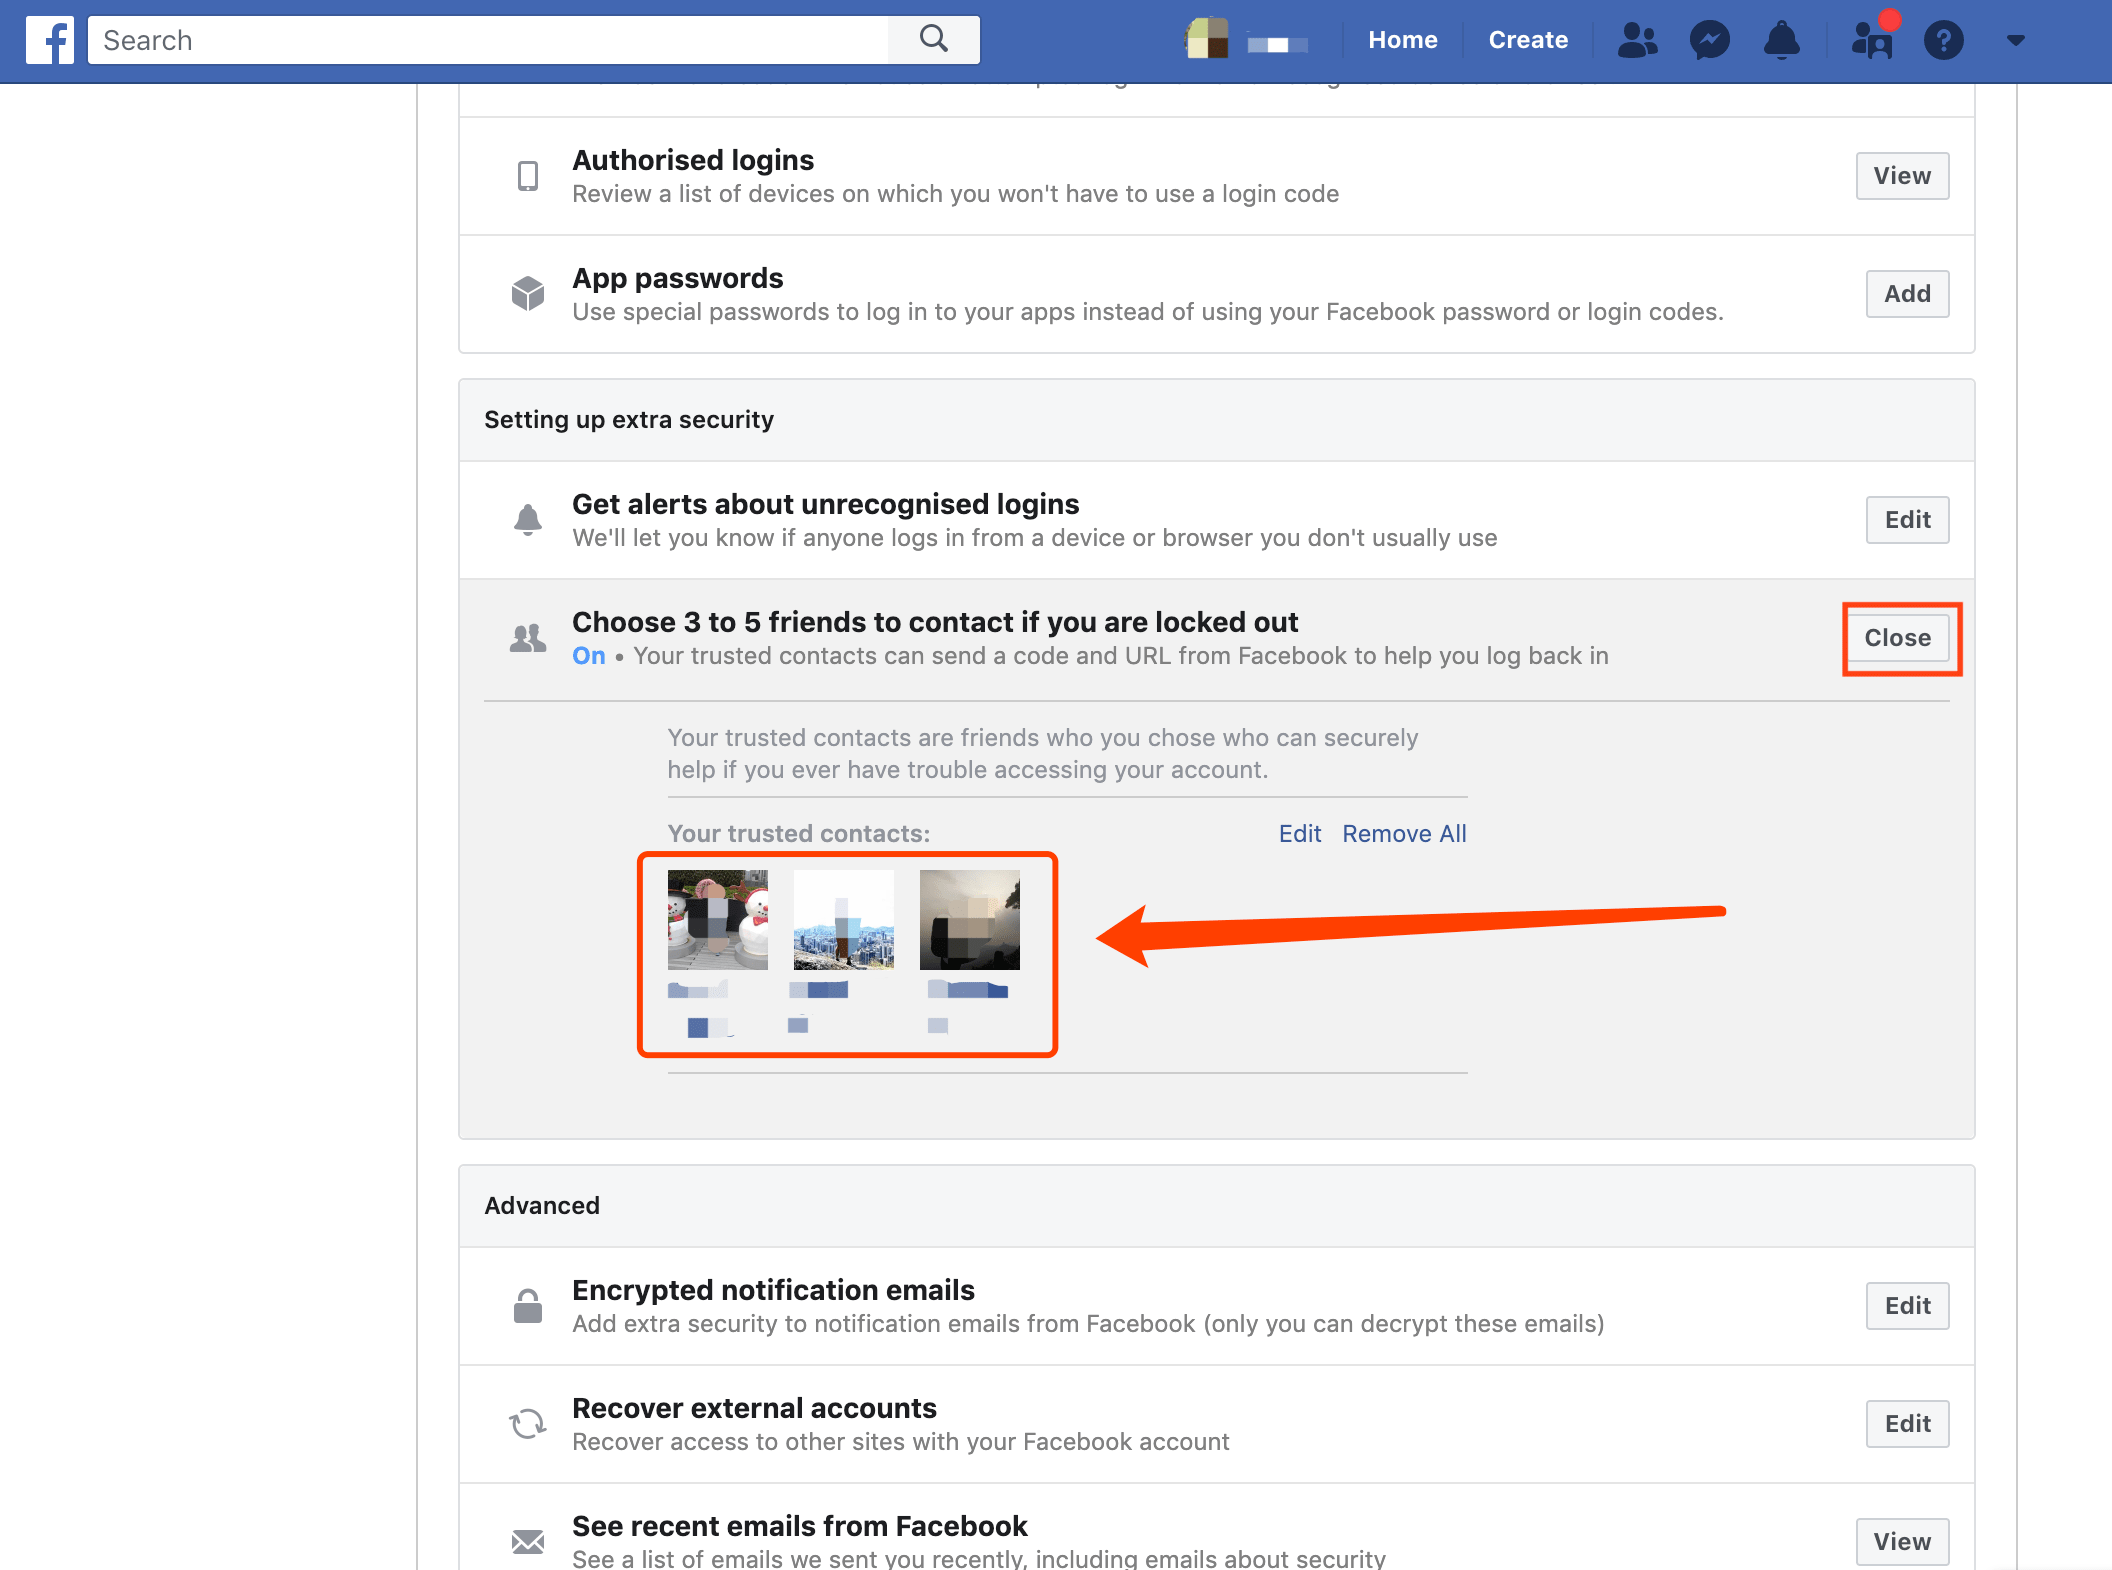
6. Check if the Trusted Contacts you have set are correct, then click [ Close ]
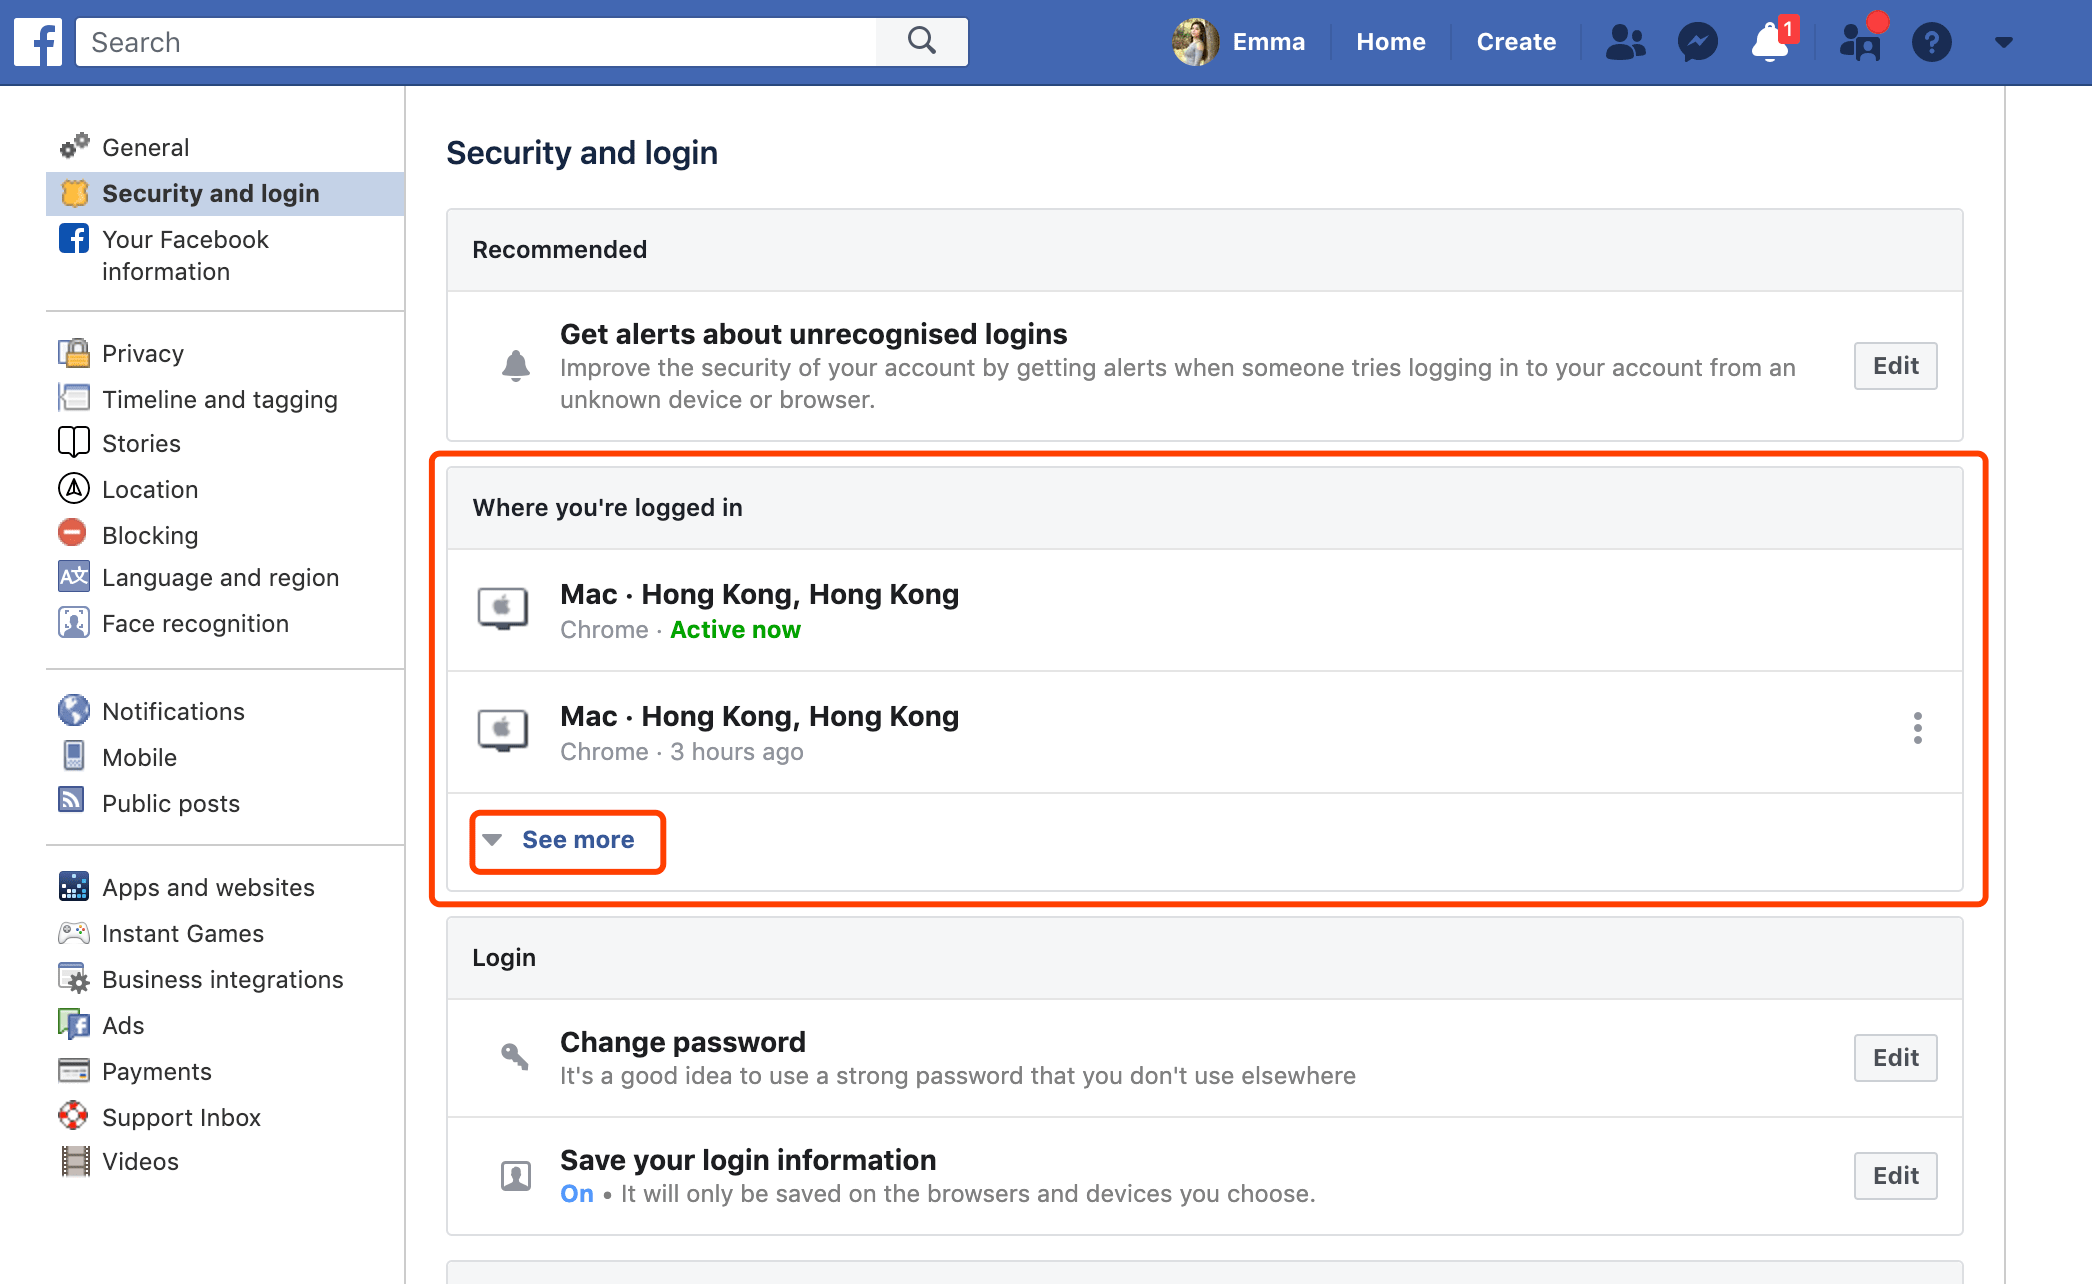
7. Secondly, check your login activities to ensure your Facebook Personal Account didn’t get hacked by others before.
a. In Settings > Security and login, Go to Where you’re logged in section
b. Click [See More] to see all your login activities
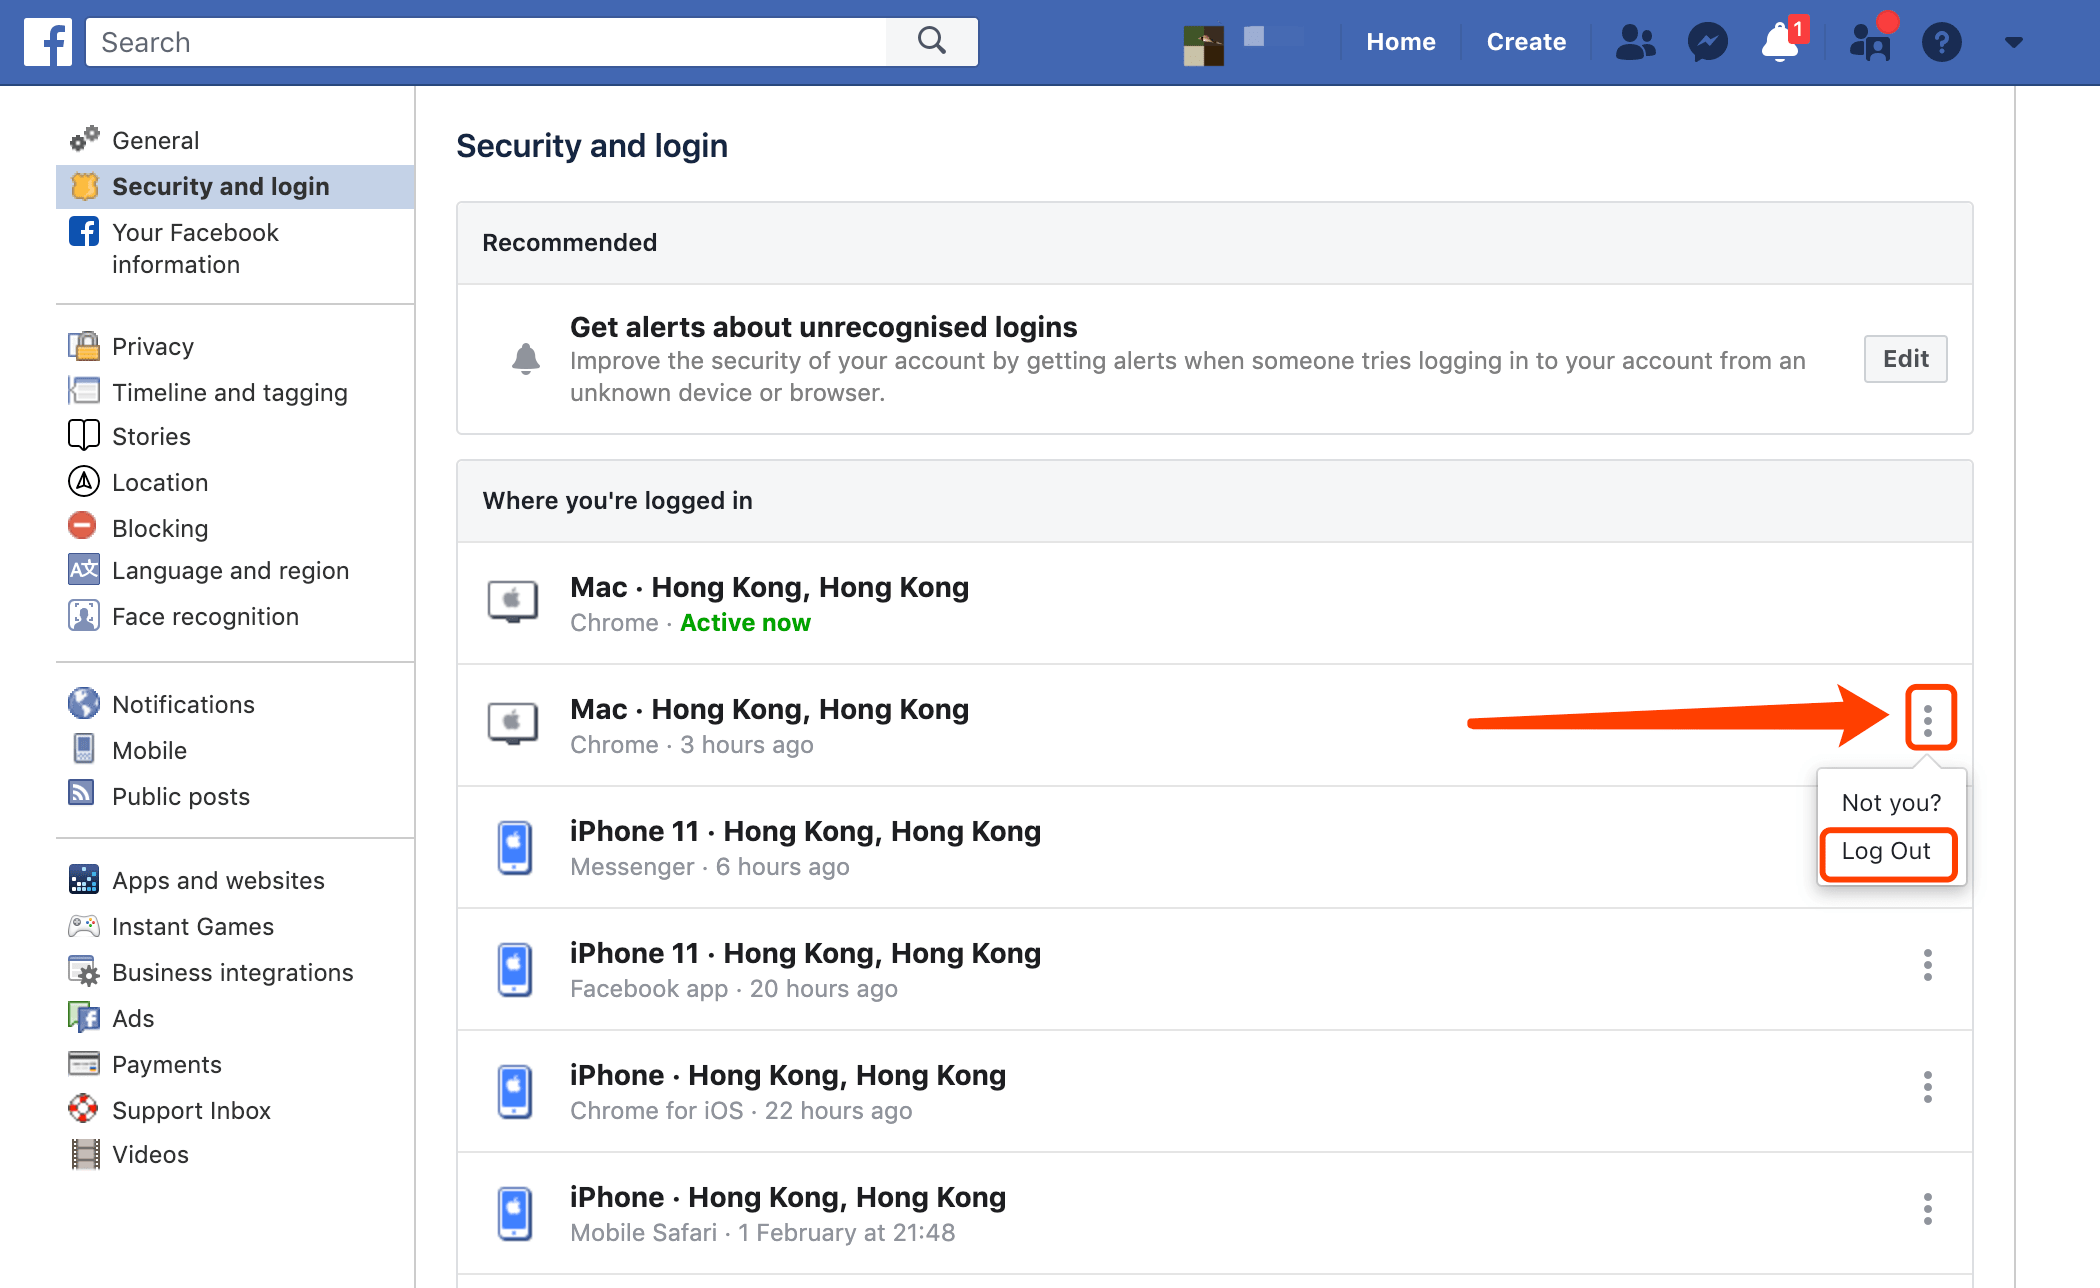
8. Click [ Log out ] if you find out any unauthorised login activities in Where you’re logged in list
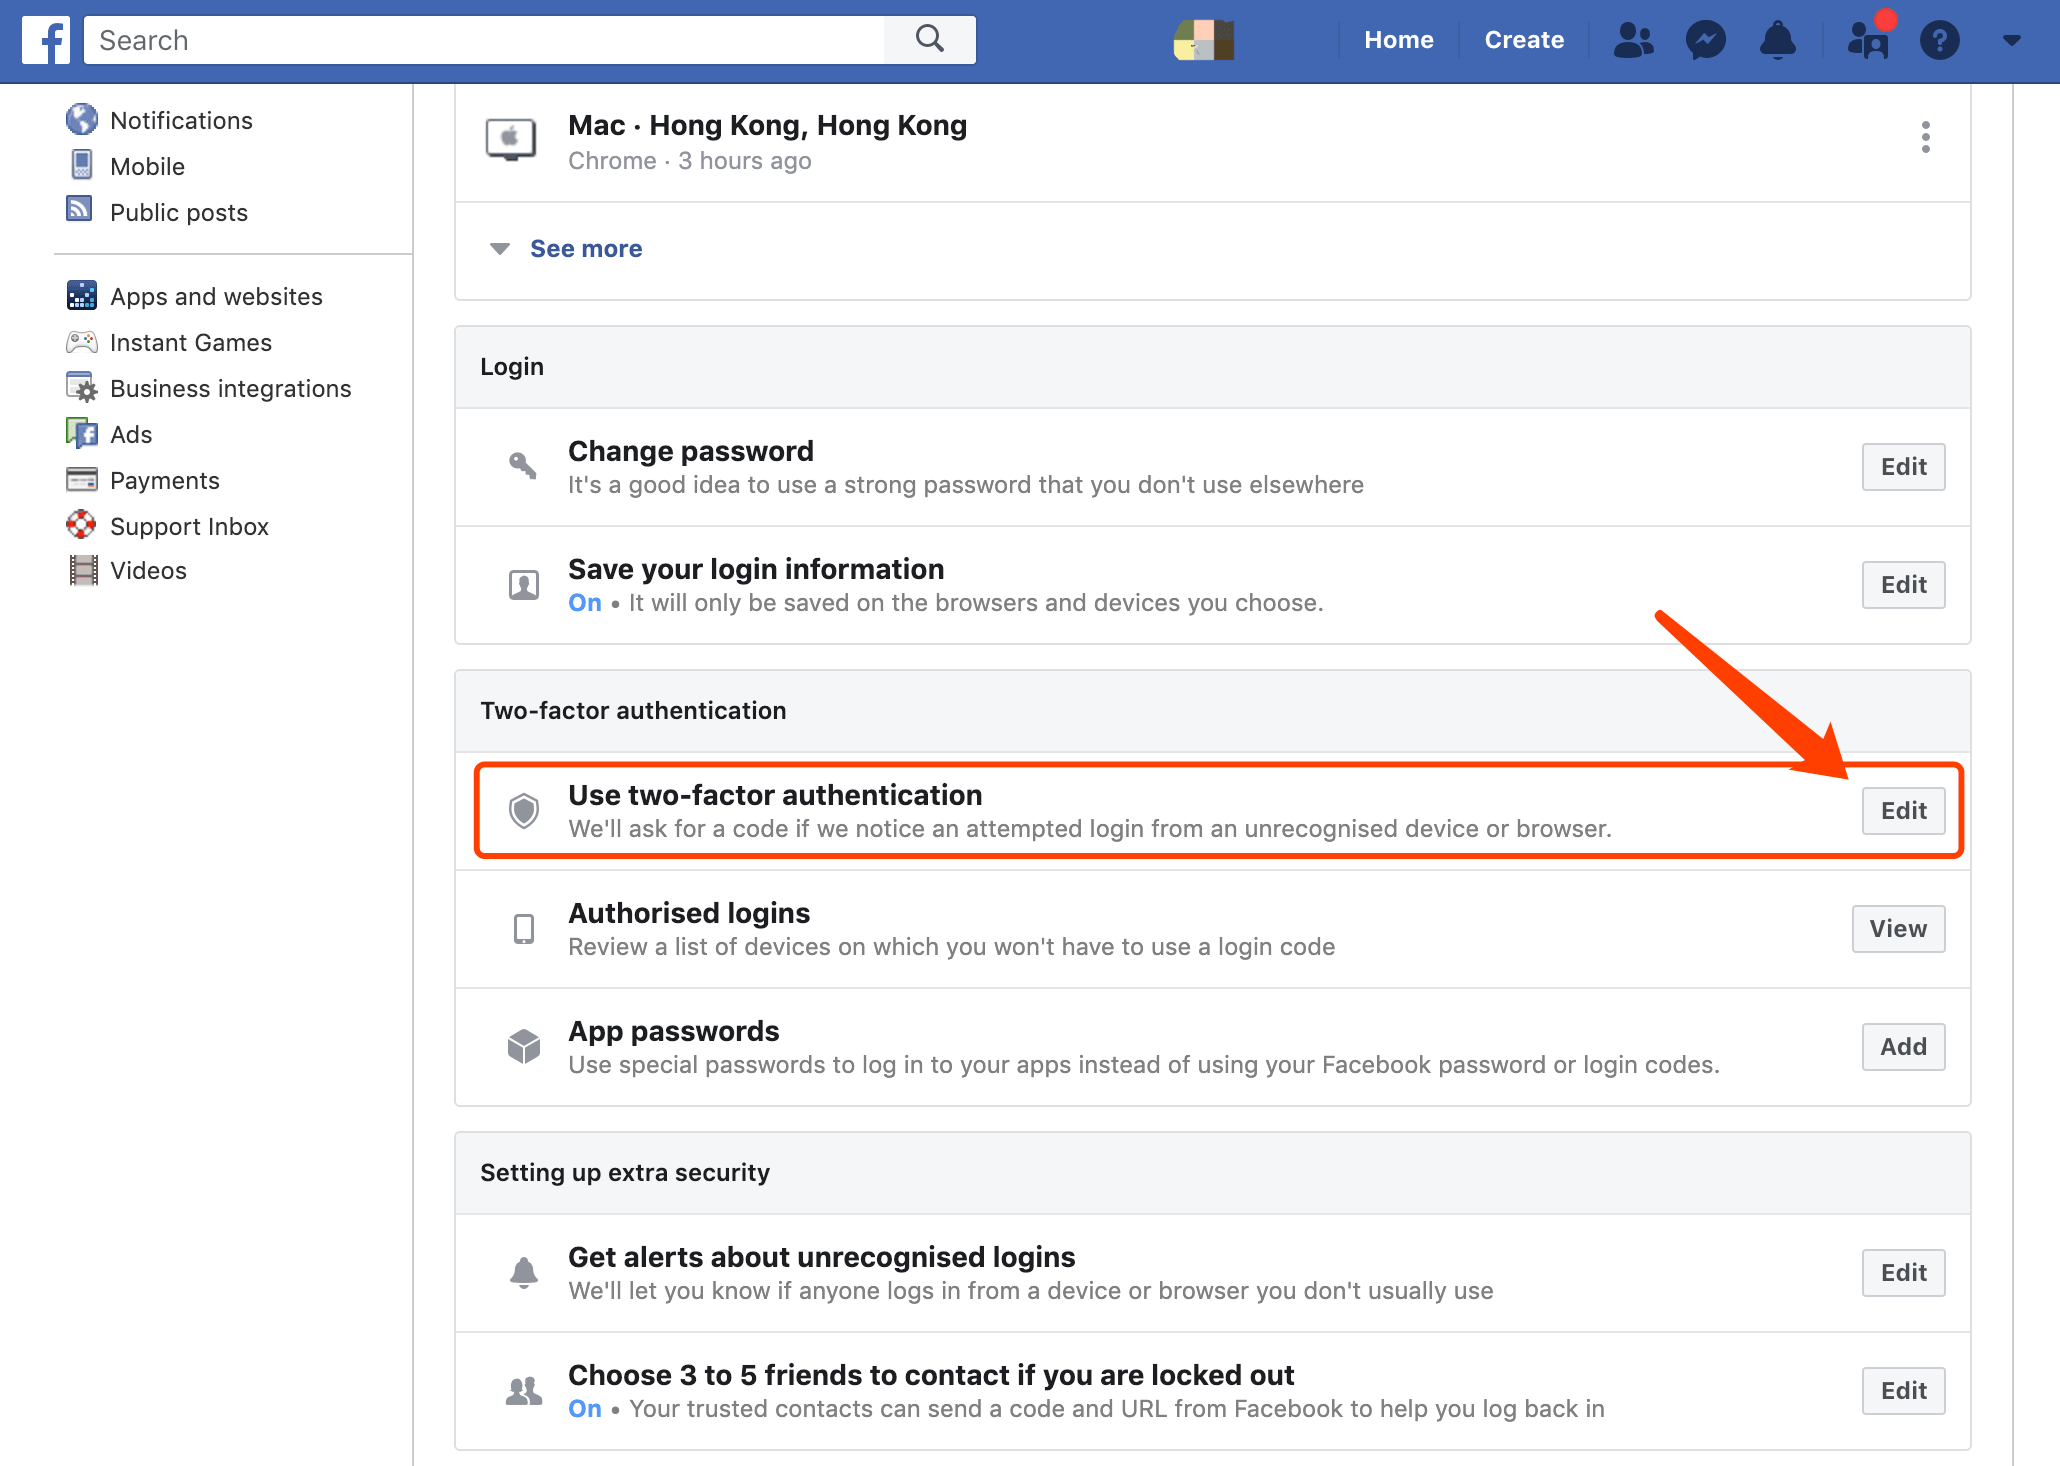
9. Last but not least, set up Two-Factor Authentication to further ensure your Facebook Personal Account safety
a. In Setting > Security and login > Go to Two-Factor Authentication section
b. Use Two-Factor Authentication > [ Edit ]
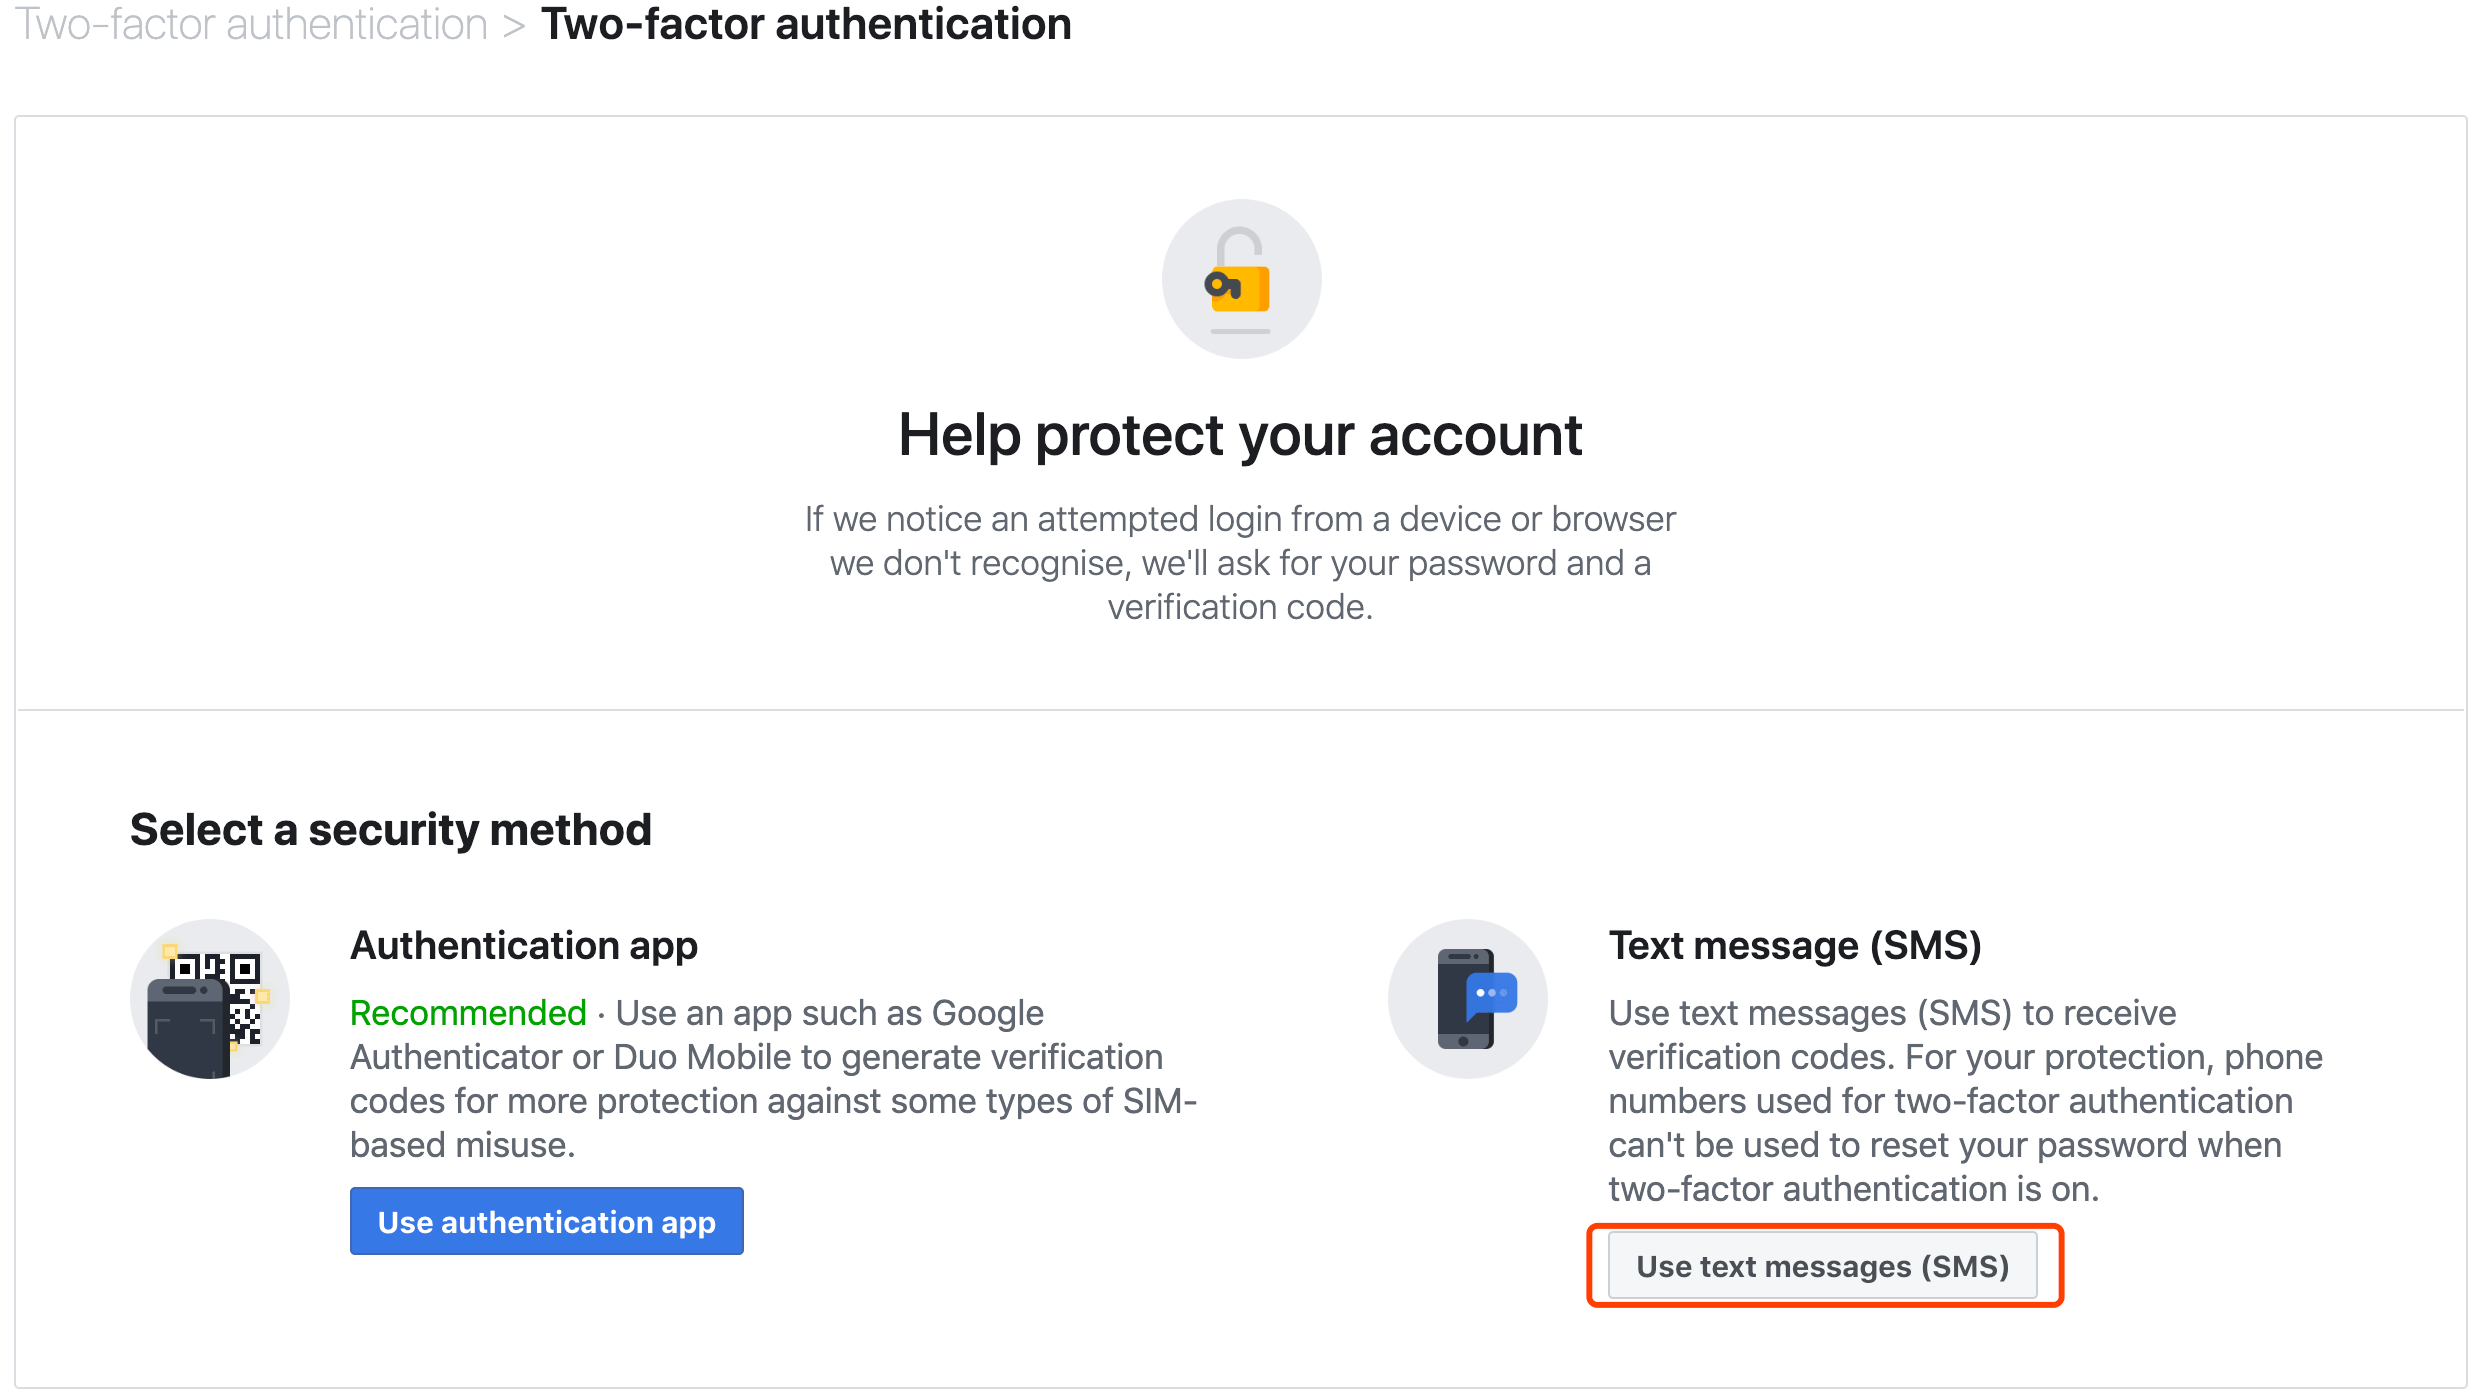
10. There are two security methods in Two-Factor Authentication, Authentication App and Text Message (SMS).
a. As you need to download extra apps such as Google Authenticator or Duo Mobile for Authentication App verification, therefore for the sake of simplicity, Text Message (SMS) is a more preferable way to do the authentication for most Facebook users.
b. Click [ User text message (SMS) ] under Text Message (SMS)
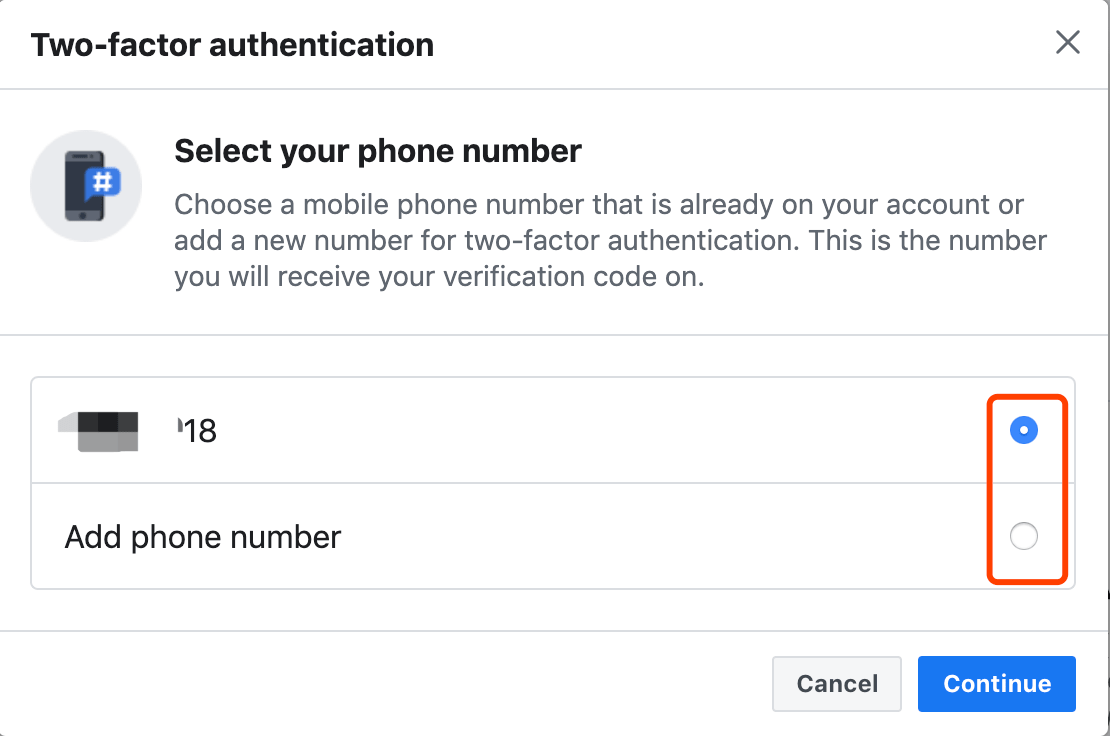
11. Select the phone number you would like use for Two-Factor Authentication, Click [ Continue ]
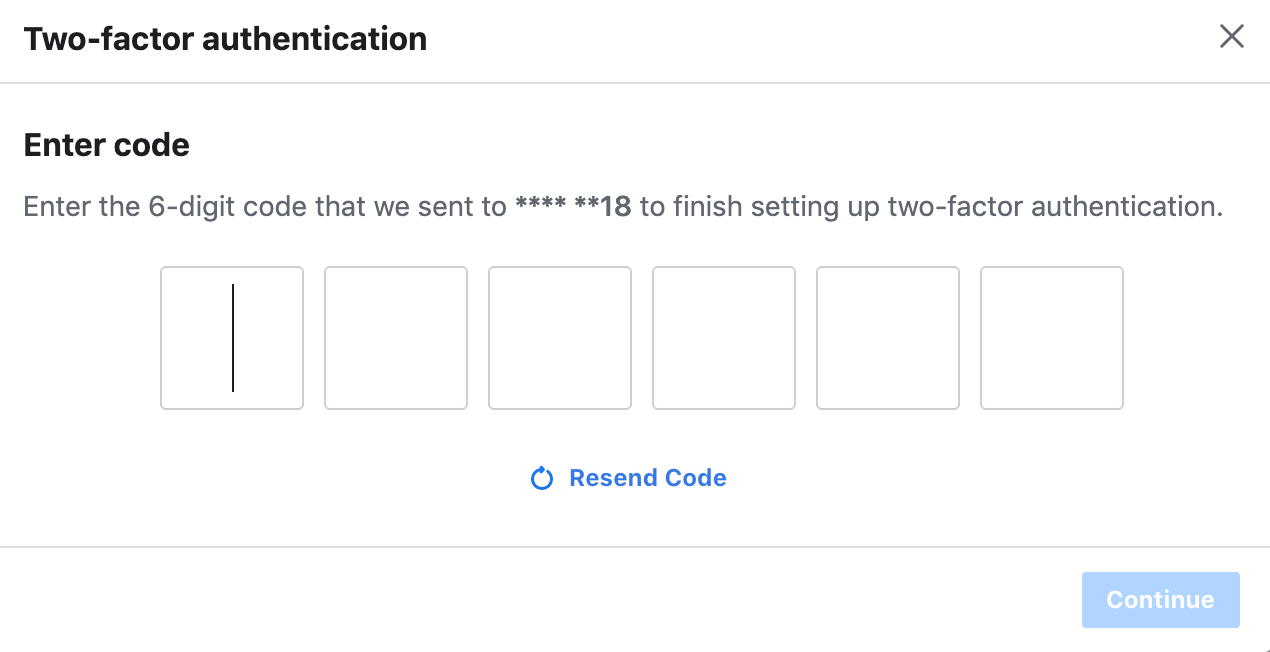
12. Then enter the 6-digit code you received from Facebook
a. [ Continue ]
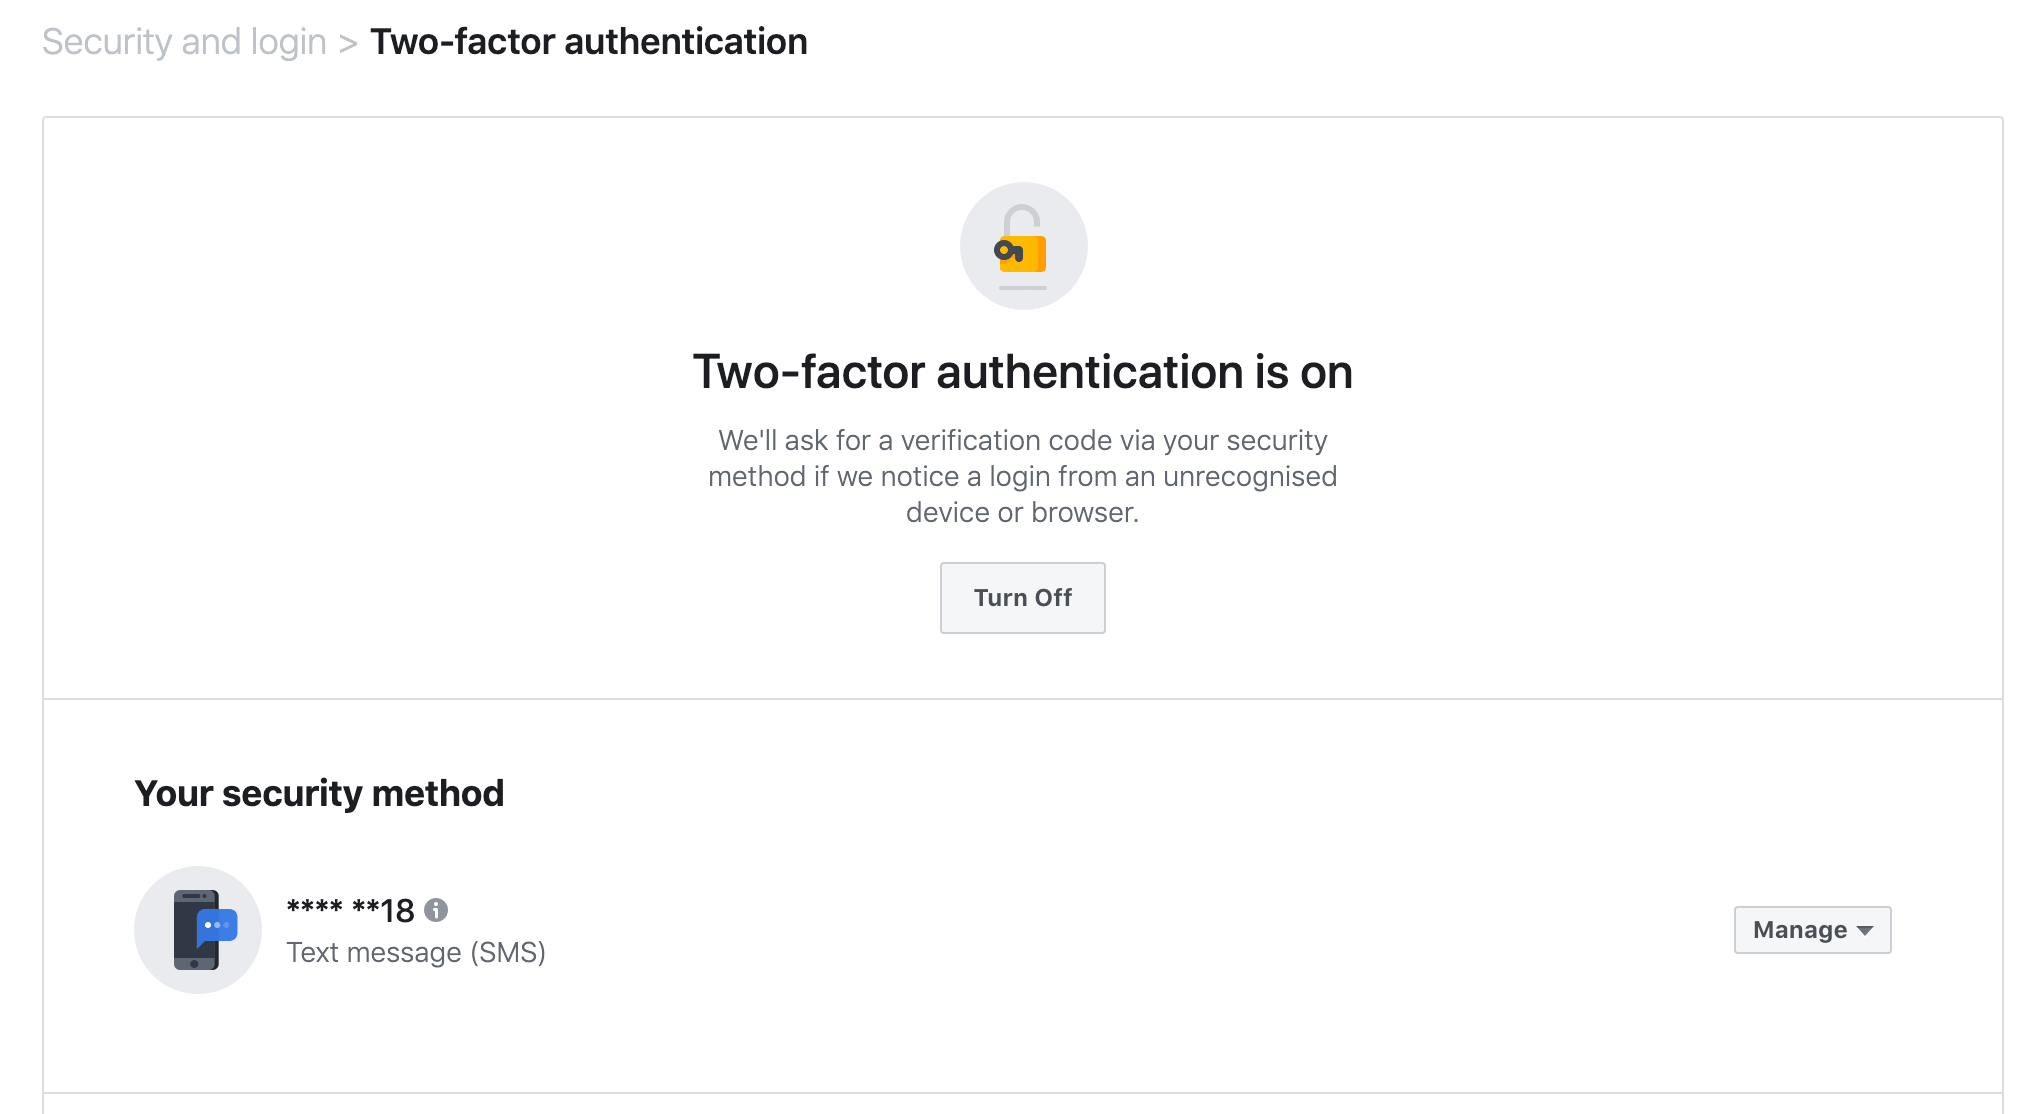
13. Then you will see your Two-Factor Authentication is on, Facebook will send you verification code via your phone number if they notice a login from an unrecognised device or browser from now on.
a. Done
Part 2 - Facebook Business Manager ID Setup
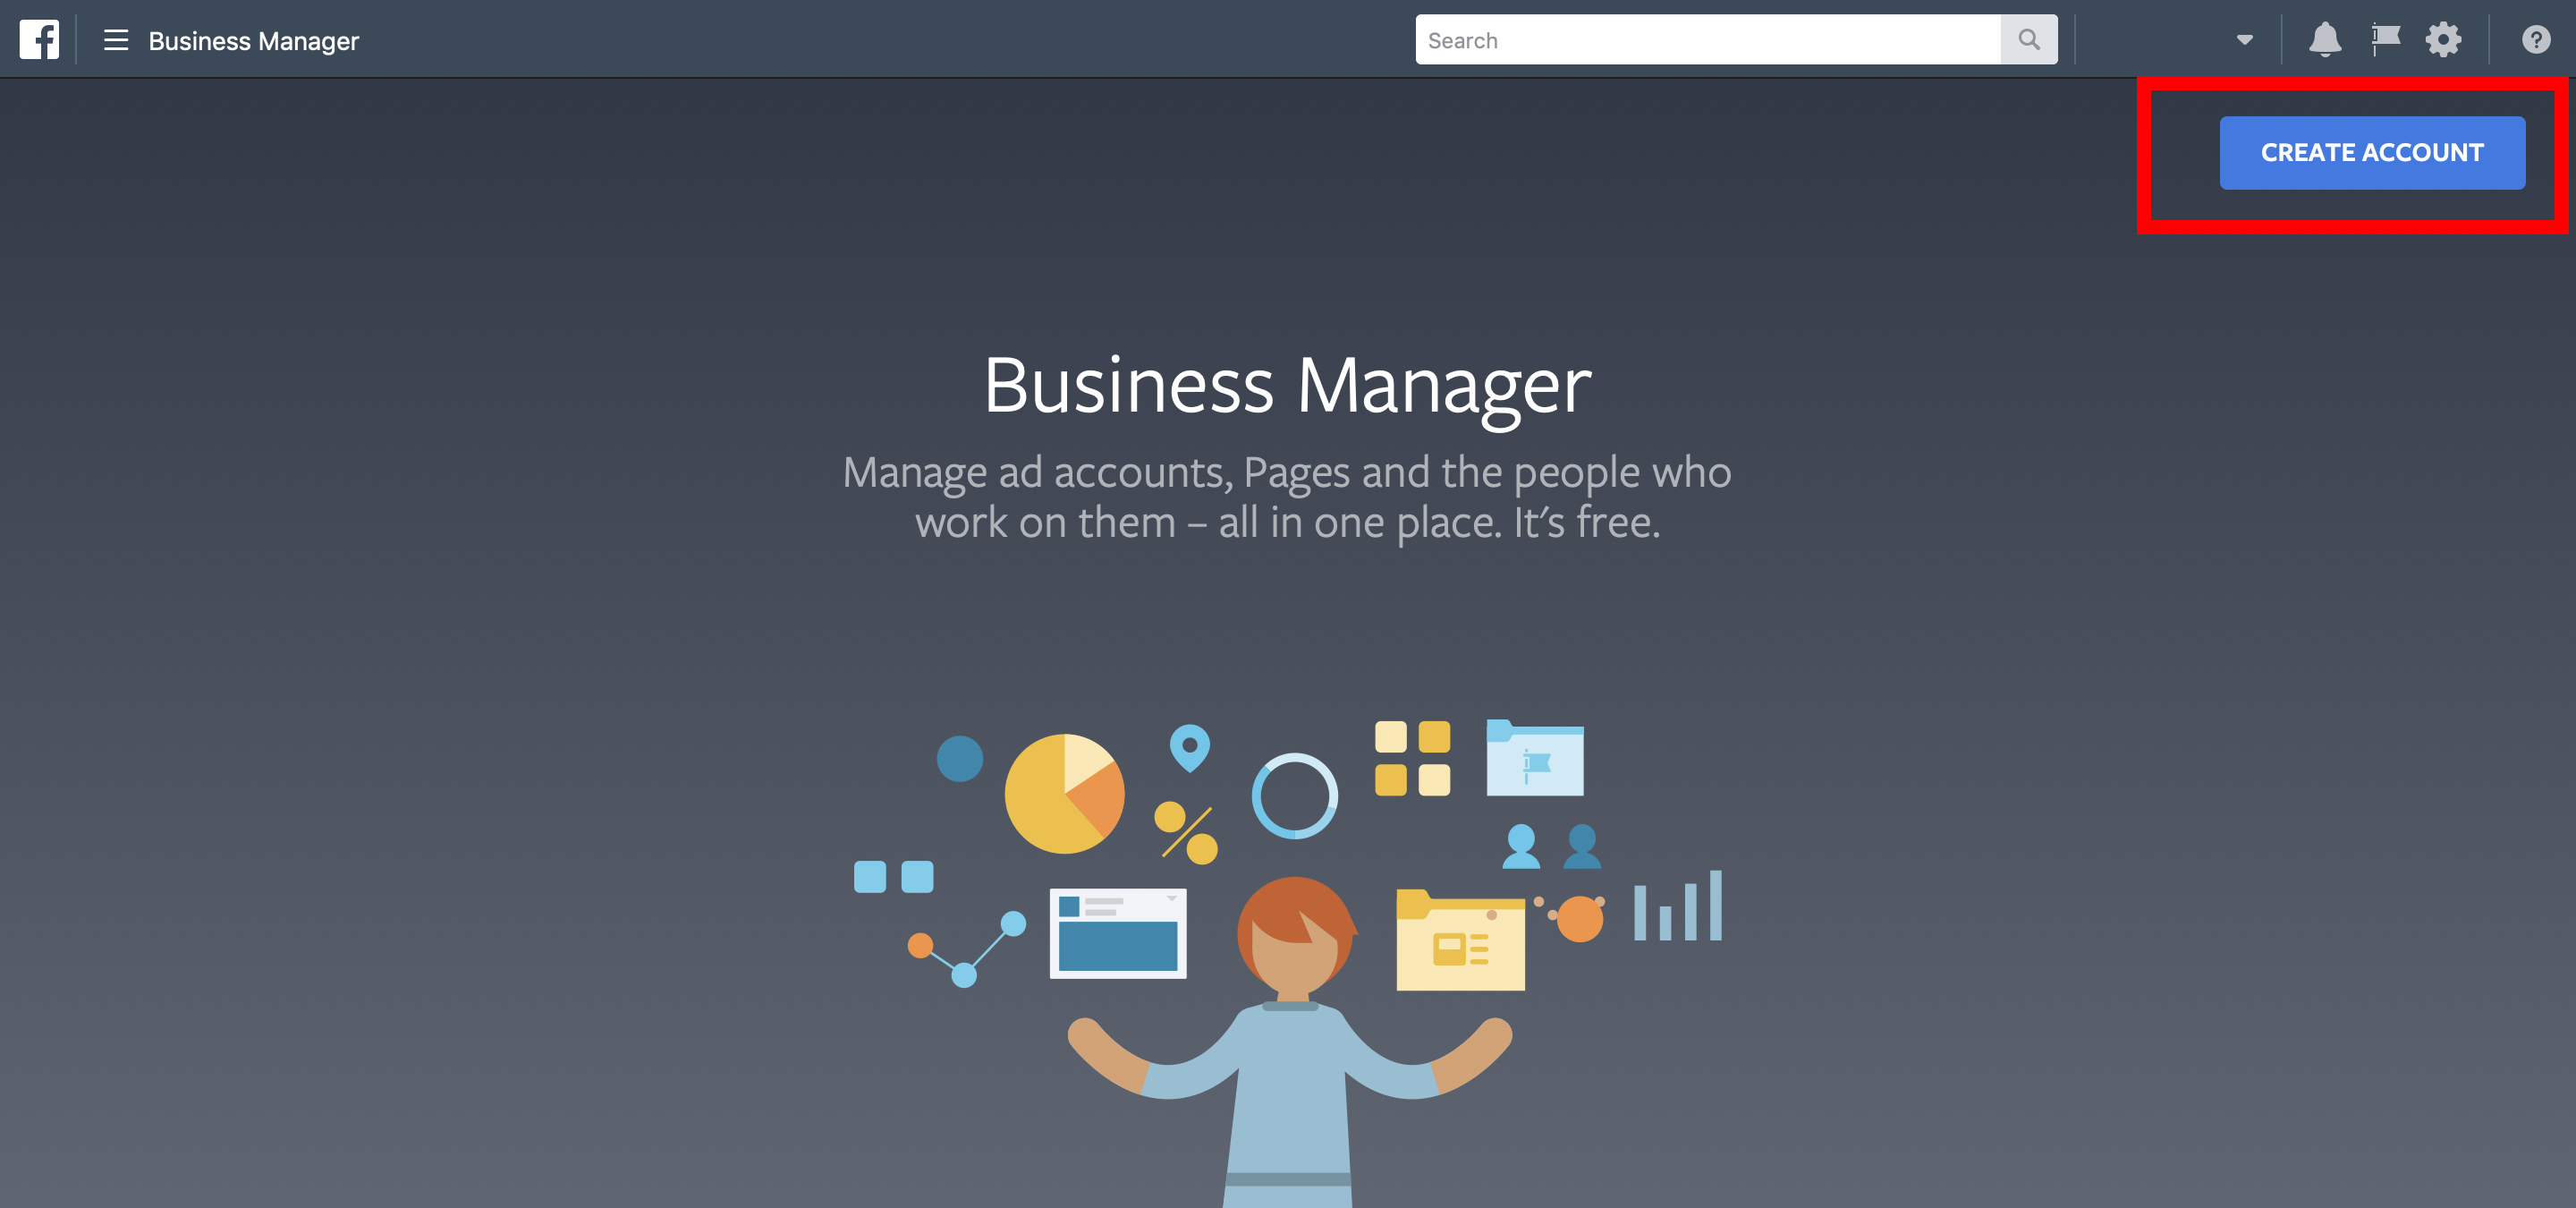
1. Go to business.facebook.com.
2. Click [ Create Account ]
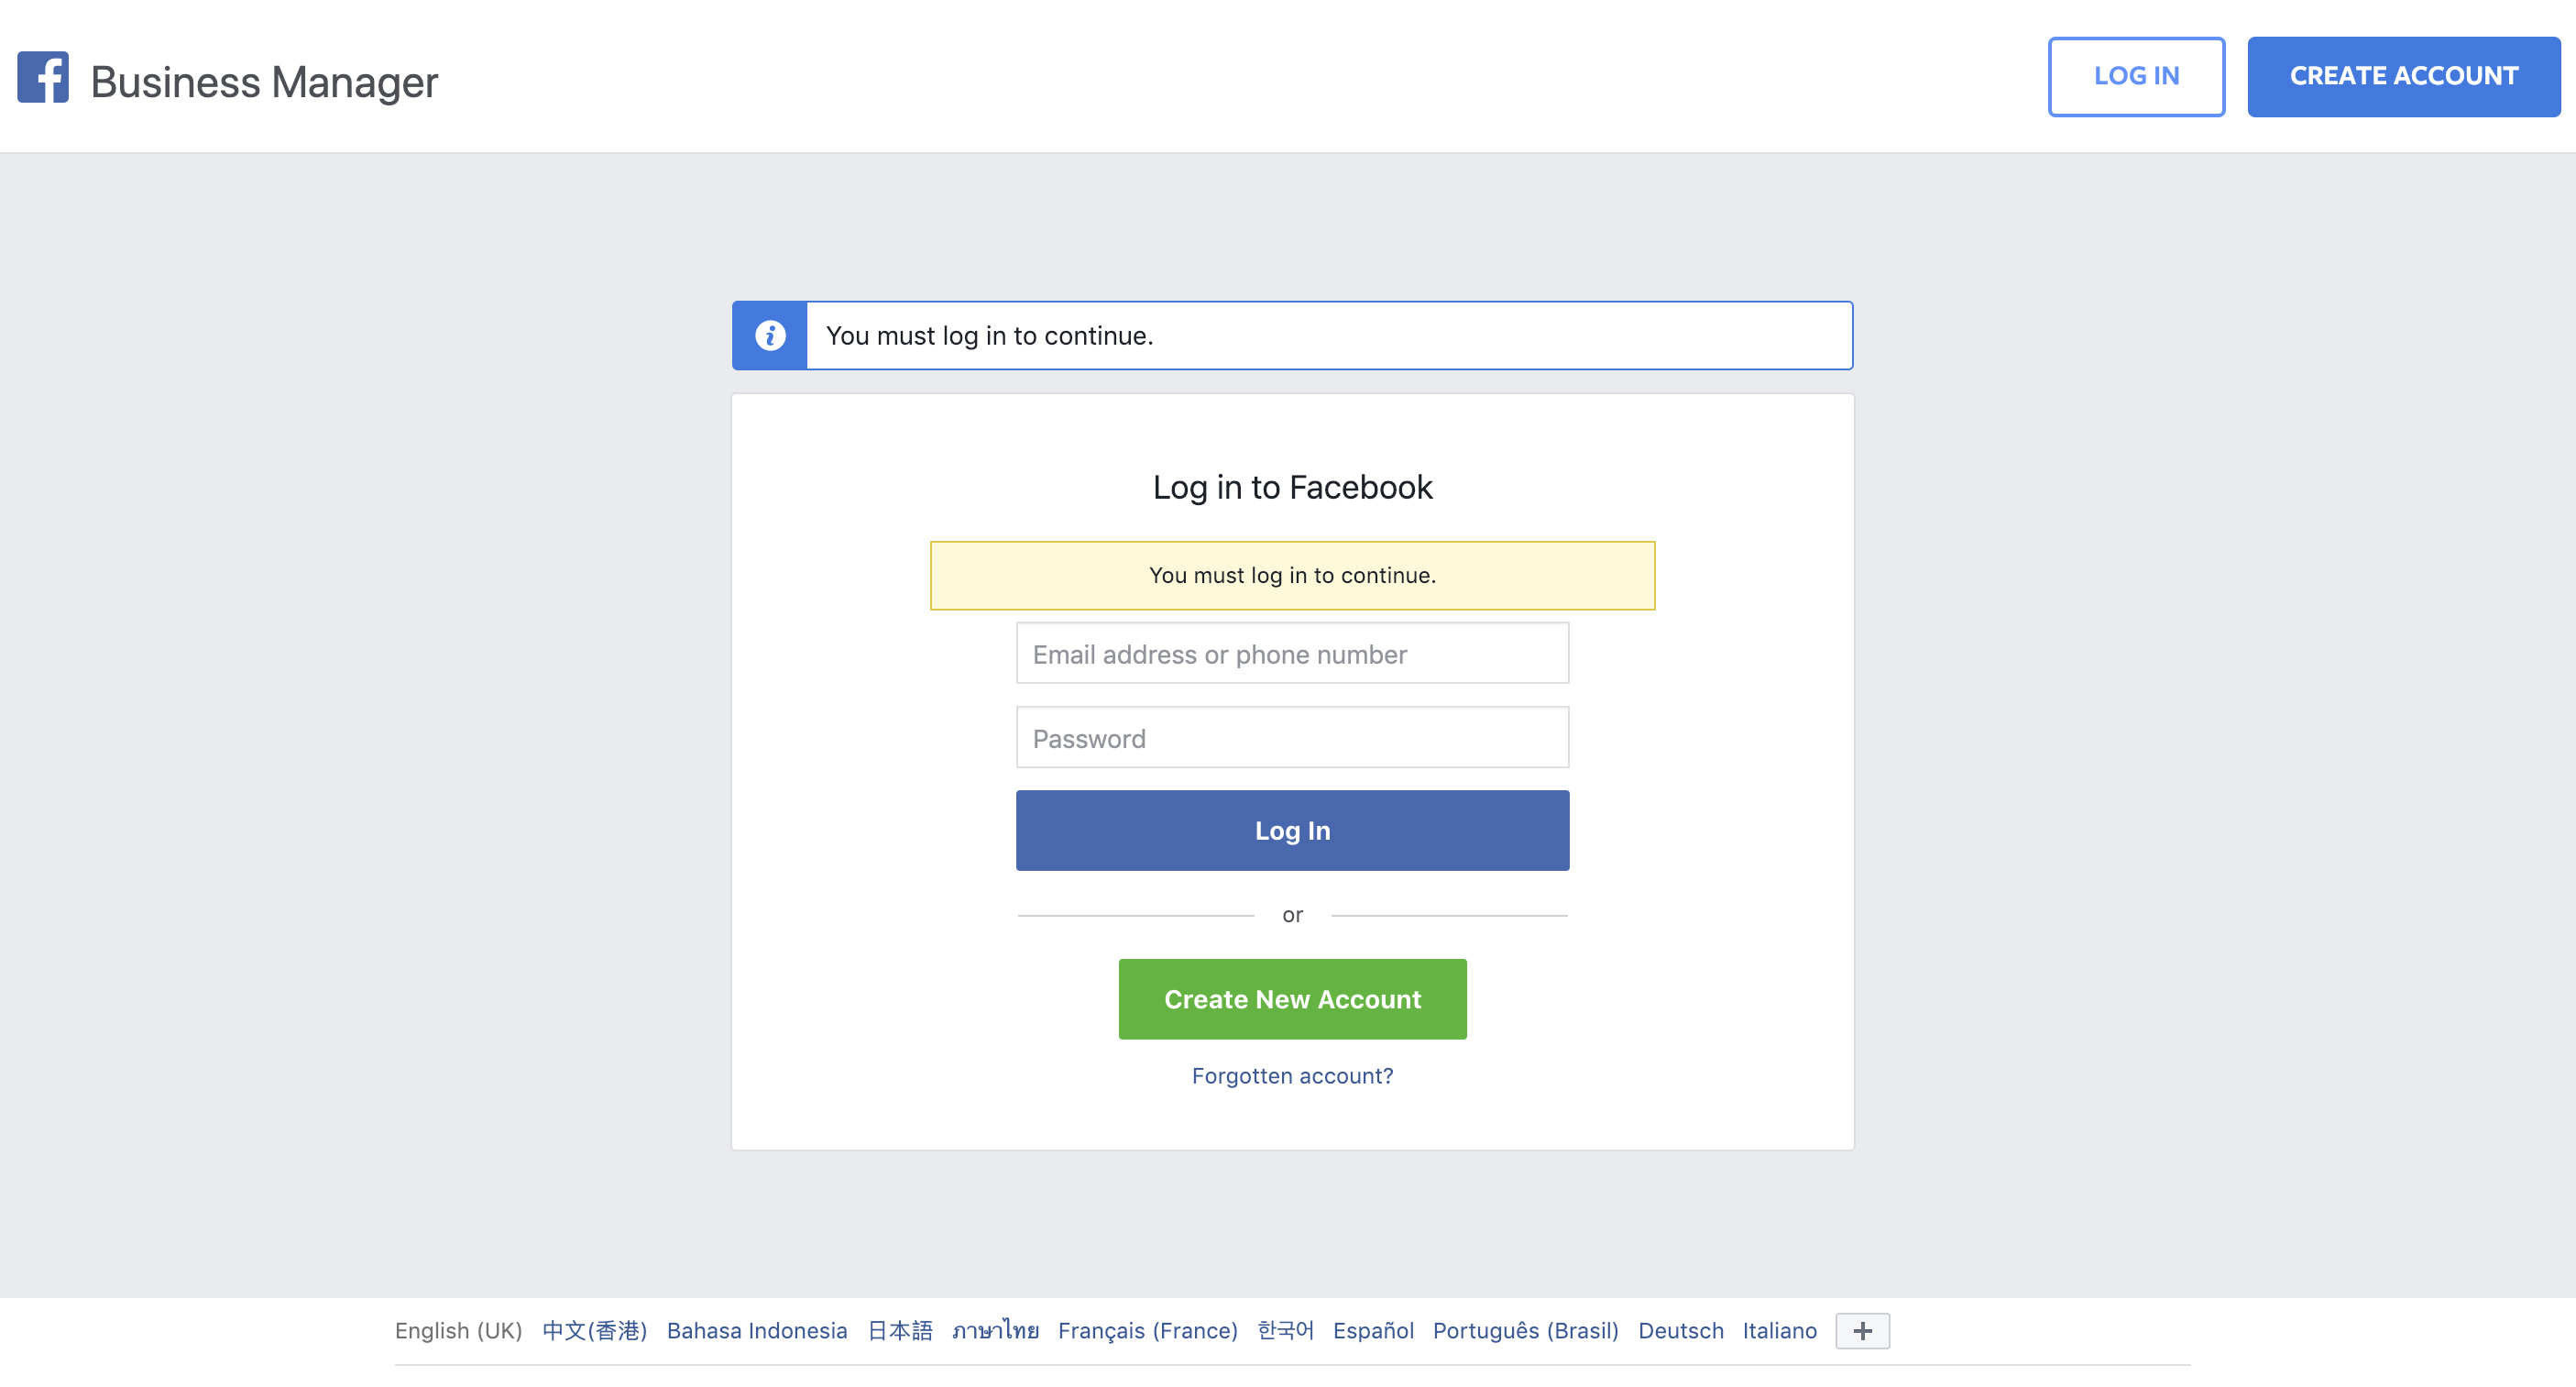
3. Enter your Personal Facebook Account
log in email and password
a. The Personal Facebook Account you used should be THE SAME as the Personal Facebook Account which you used to create your Business Facebook Page.
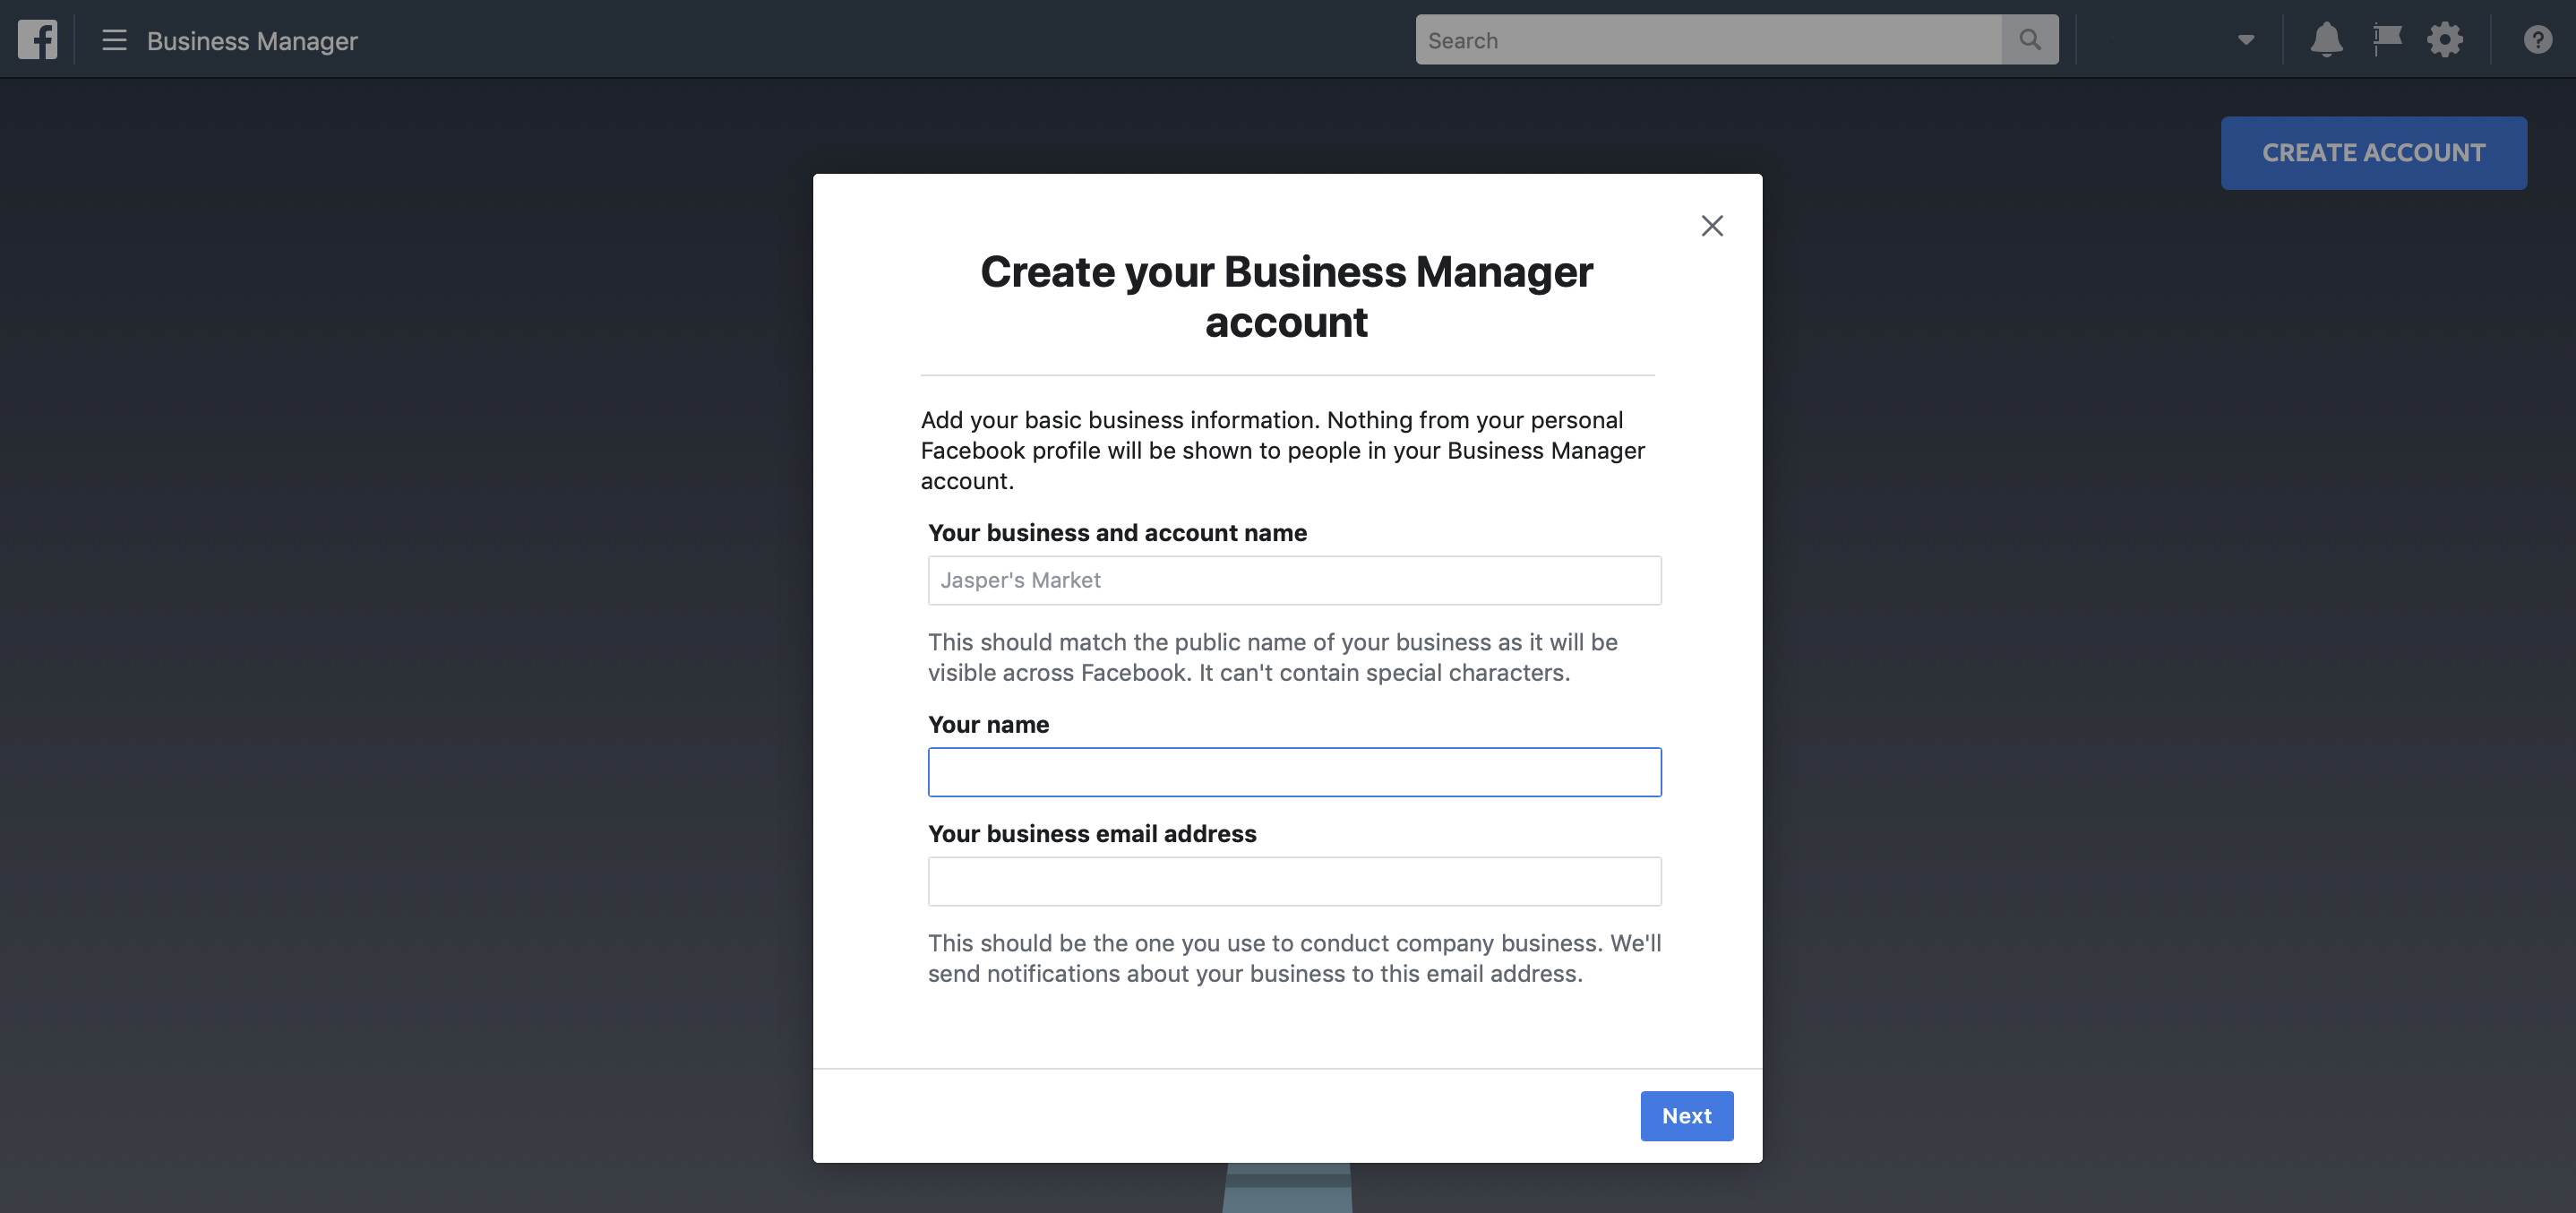
4. Name your Business Manager Account, choose the primary page and enter your name and business email.
Note: The name of your Business Manager Account does not need to align with the name of the Facebook Business page
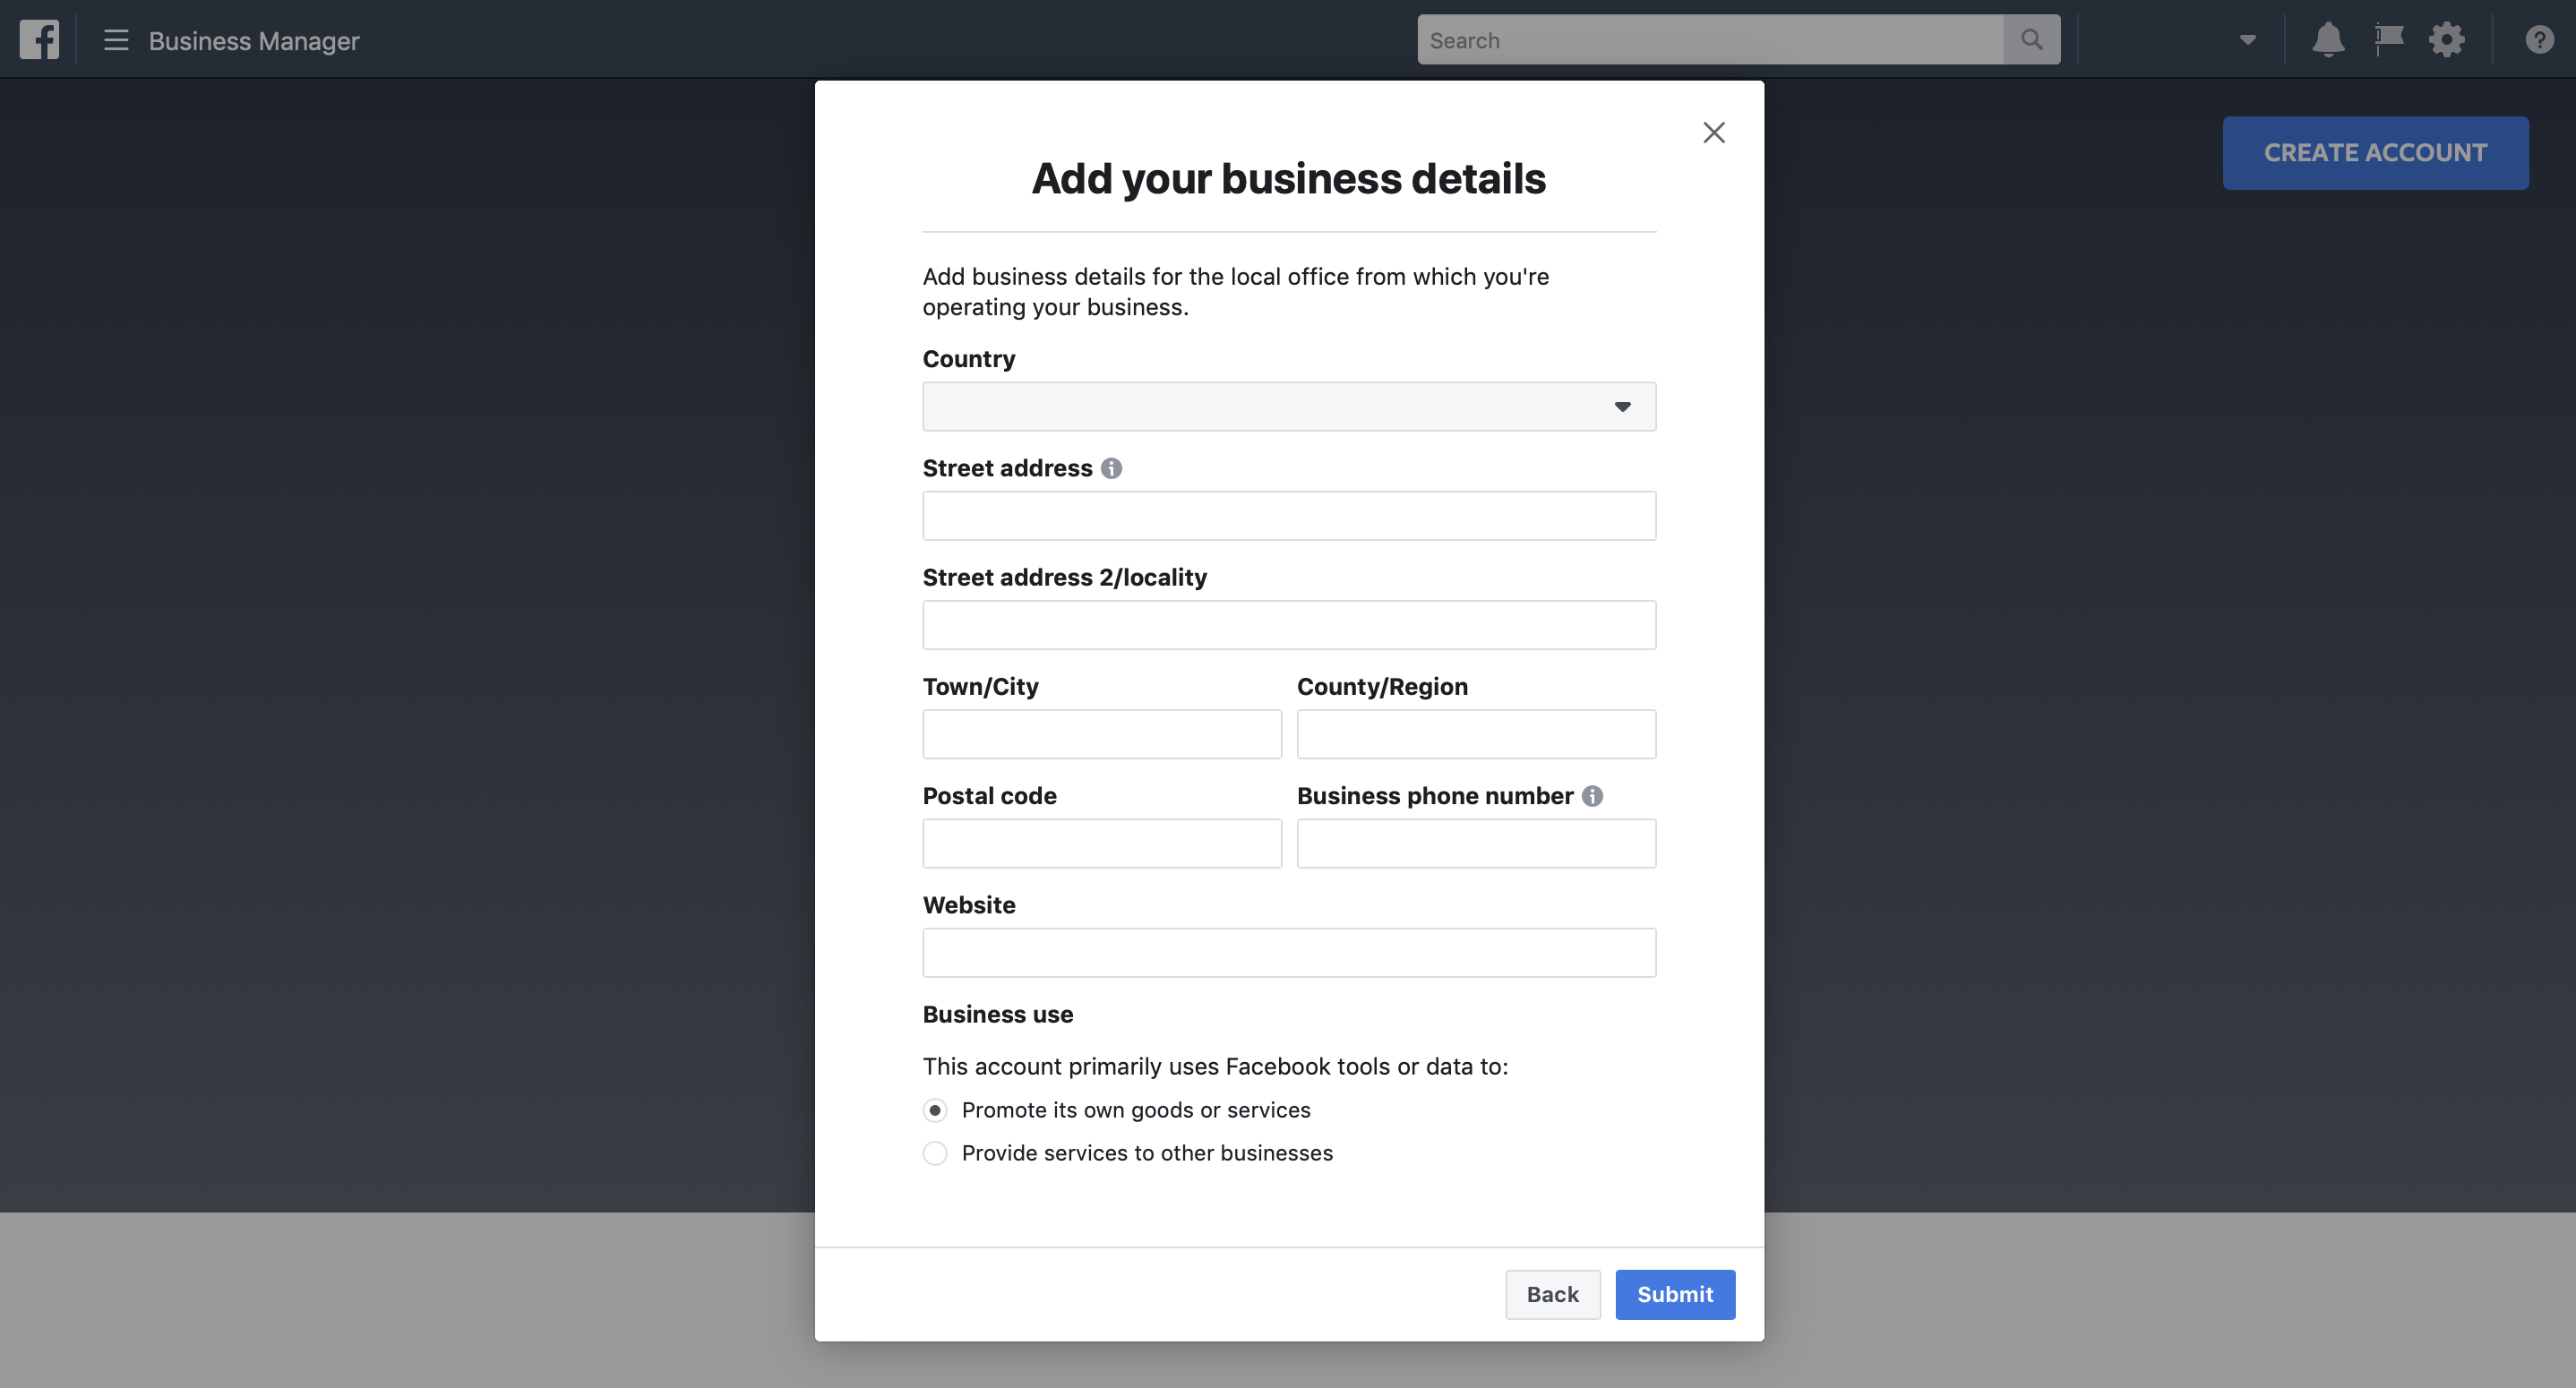
5. Filling in the rest of the required fields.
Part 3 - Add additional Facebook Page or Ad Account to the Business Manager
Objective
- Add your additional Facebook Business Pages or Facebook Ad Account to your Facebook Business Manager account so that you can manage all of them in one place.
Audience
- Client
Prerequisite
- You must also have an admin access right of the Facebook Business Page and Facebook Ad Account
- You must have a Facebook Business Manager Account
Step-By-Step Guideline

1. Go to Business Manager
2. Click [ Business Settings ]
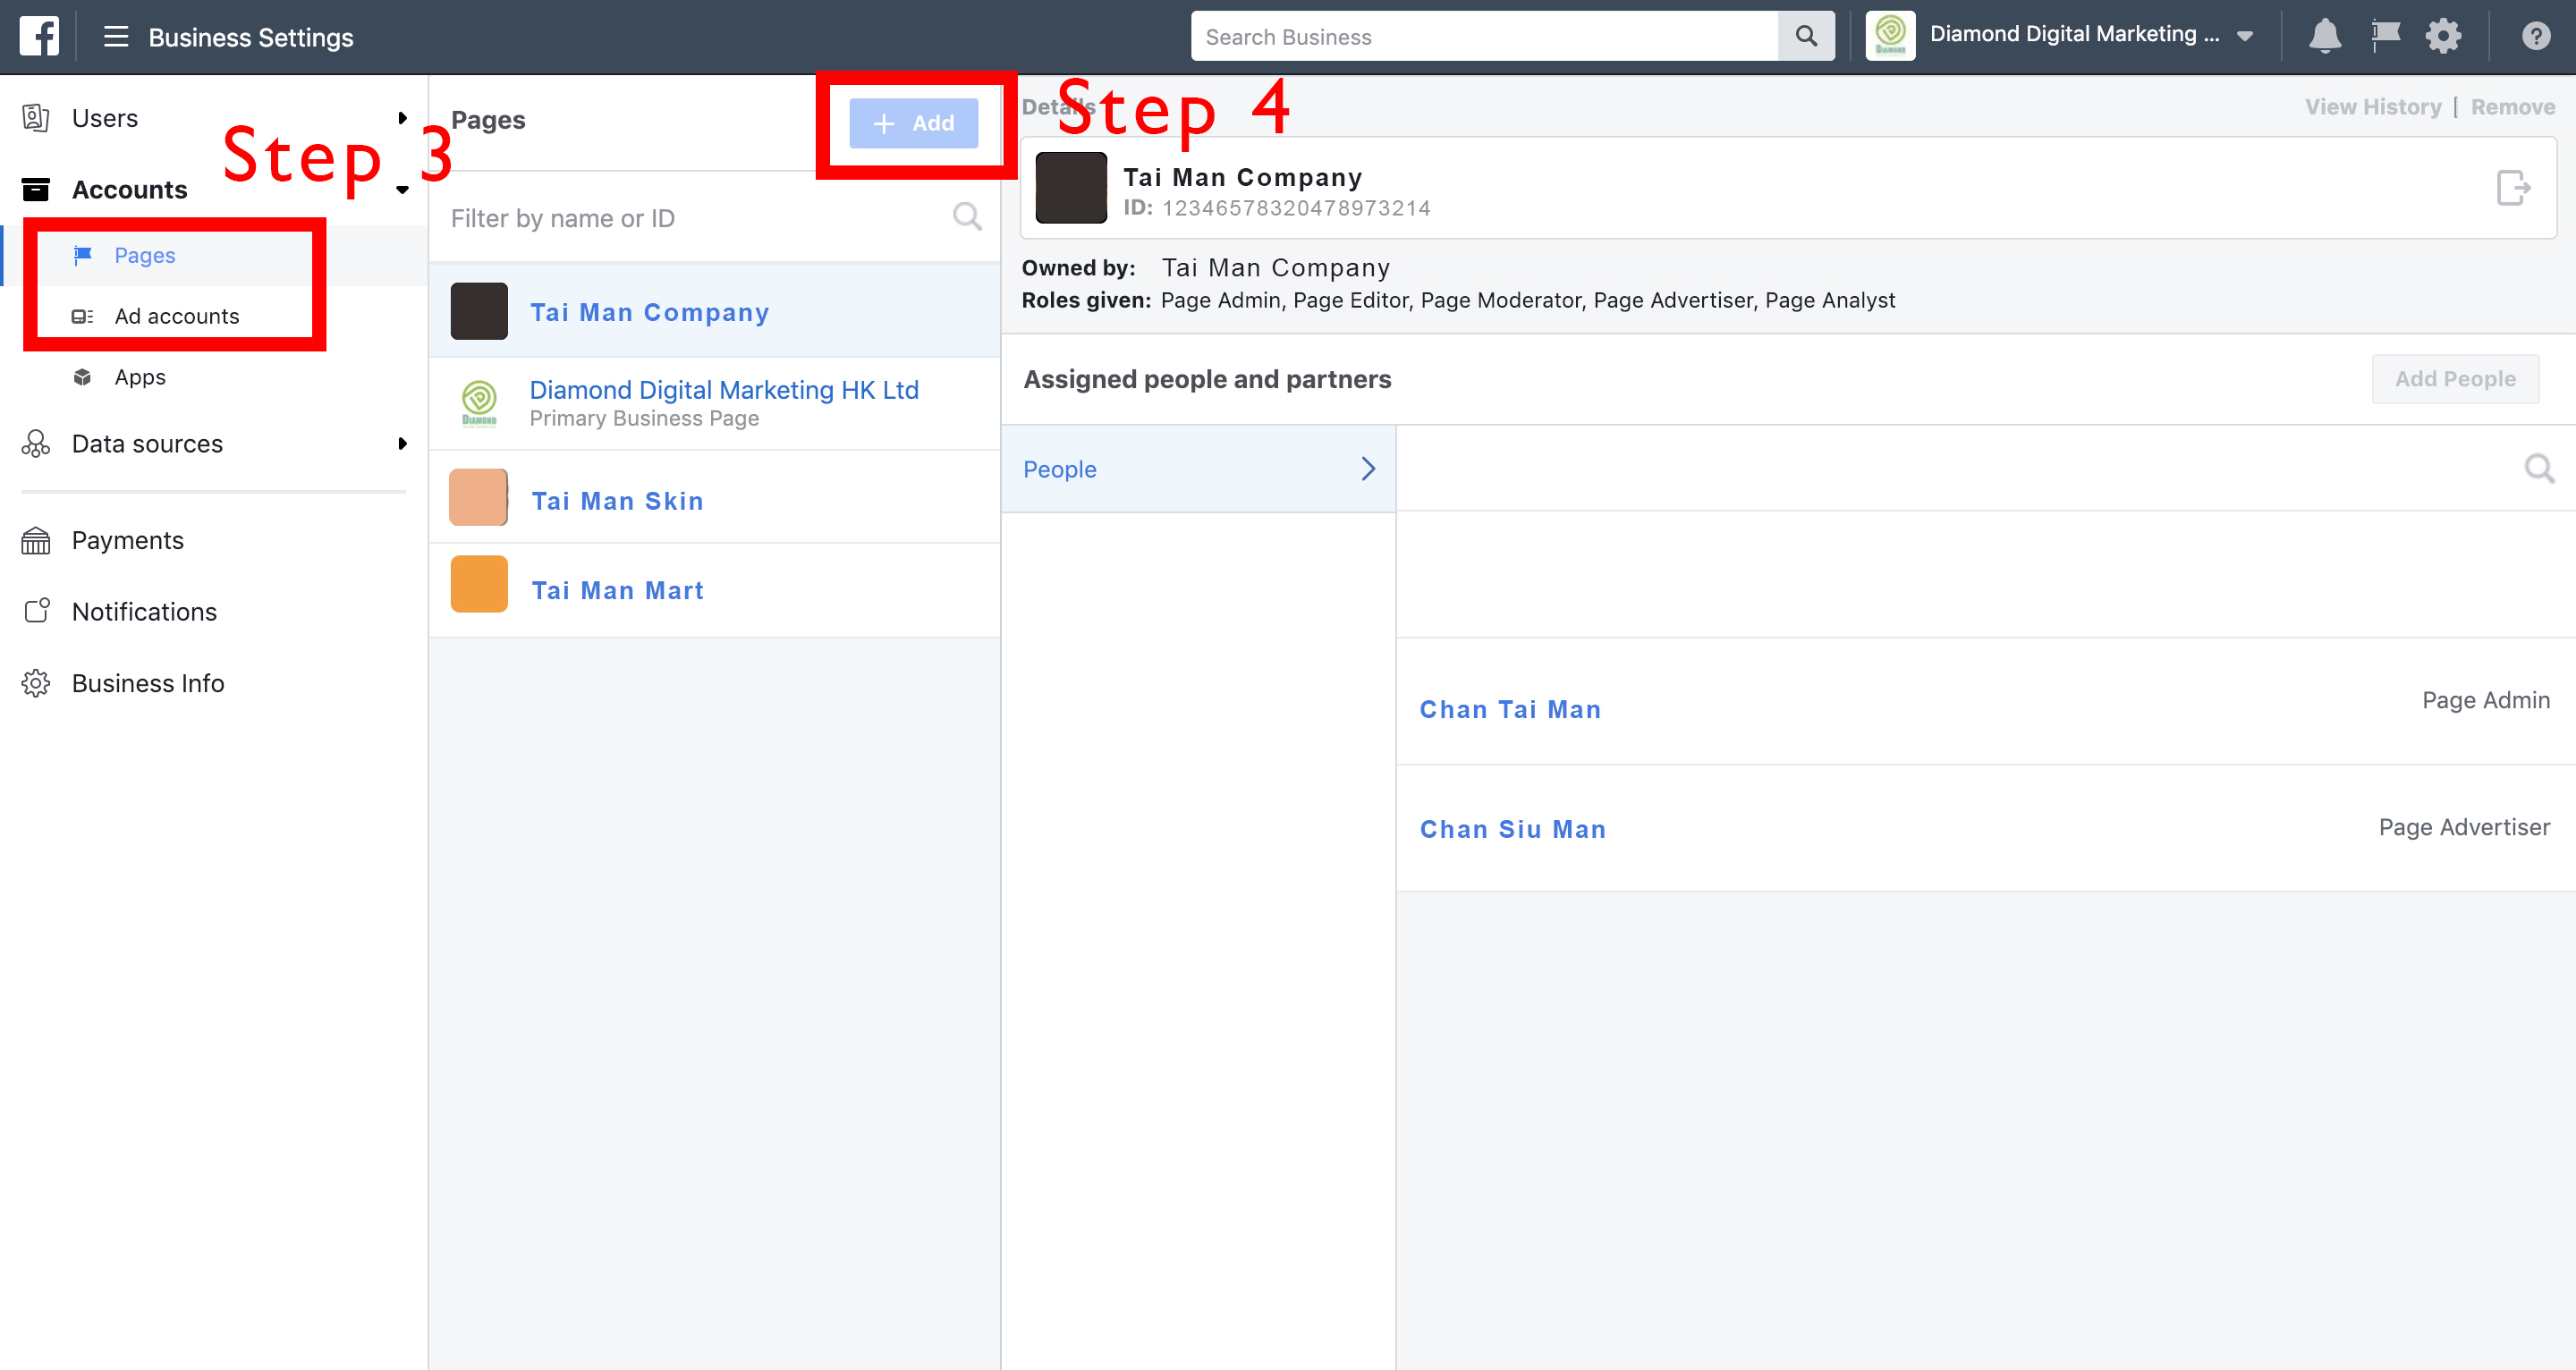
3.1 Below Accounts, click [ Pages ] OR
3.2 Below Accounts, click [ Ad Accounts ] .
4. Click [ + Add ].
5.1 Select [ Add a Page ] OR
5.2 Select [ Add an Ad Account ].
6. Enter your different Facebook Business Page name, Facebook Ad Account ID or URL.

Note: Only for company owns multiple Ad Account ID and Pixel ID!
Since one Ad Account ID can only pair up with one Pixel ID, make sure you give us the correct Ad Account ID and Pixel ID.
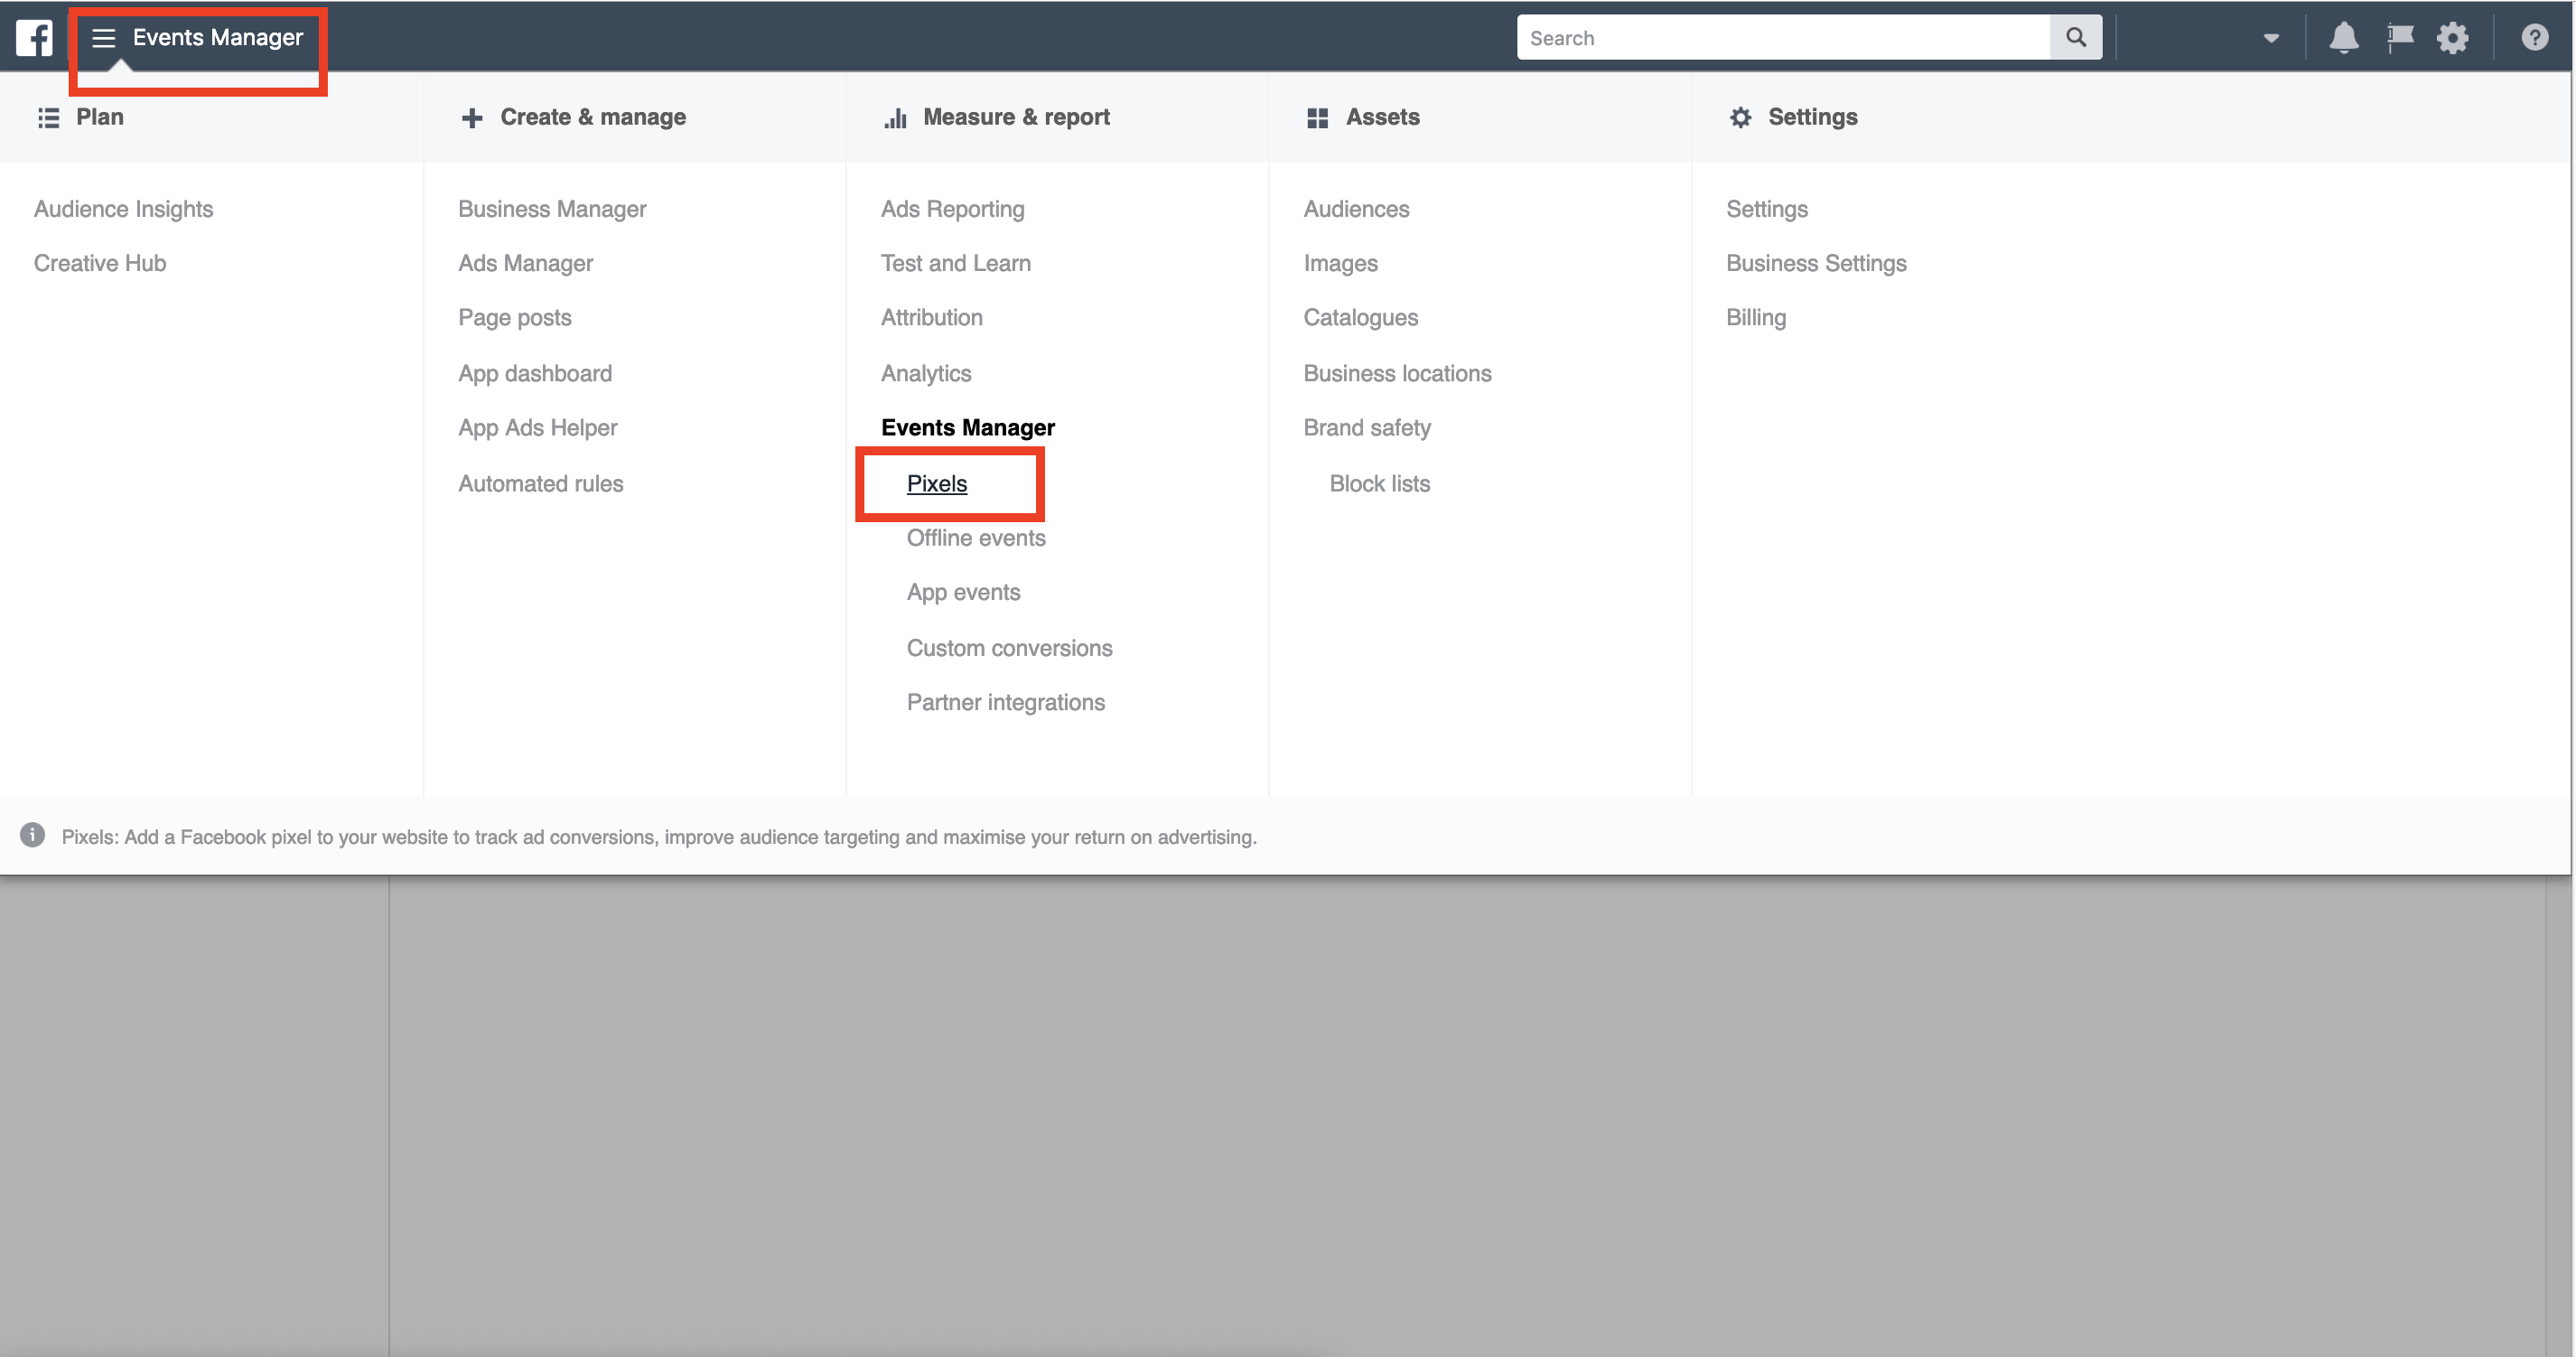
How to check which pixel ID paired up with my Ad Account?
1. Go to Business Manager
2. Click [ Event Settings ]
3. Under Measure & Report Session, click [ Pixels ]
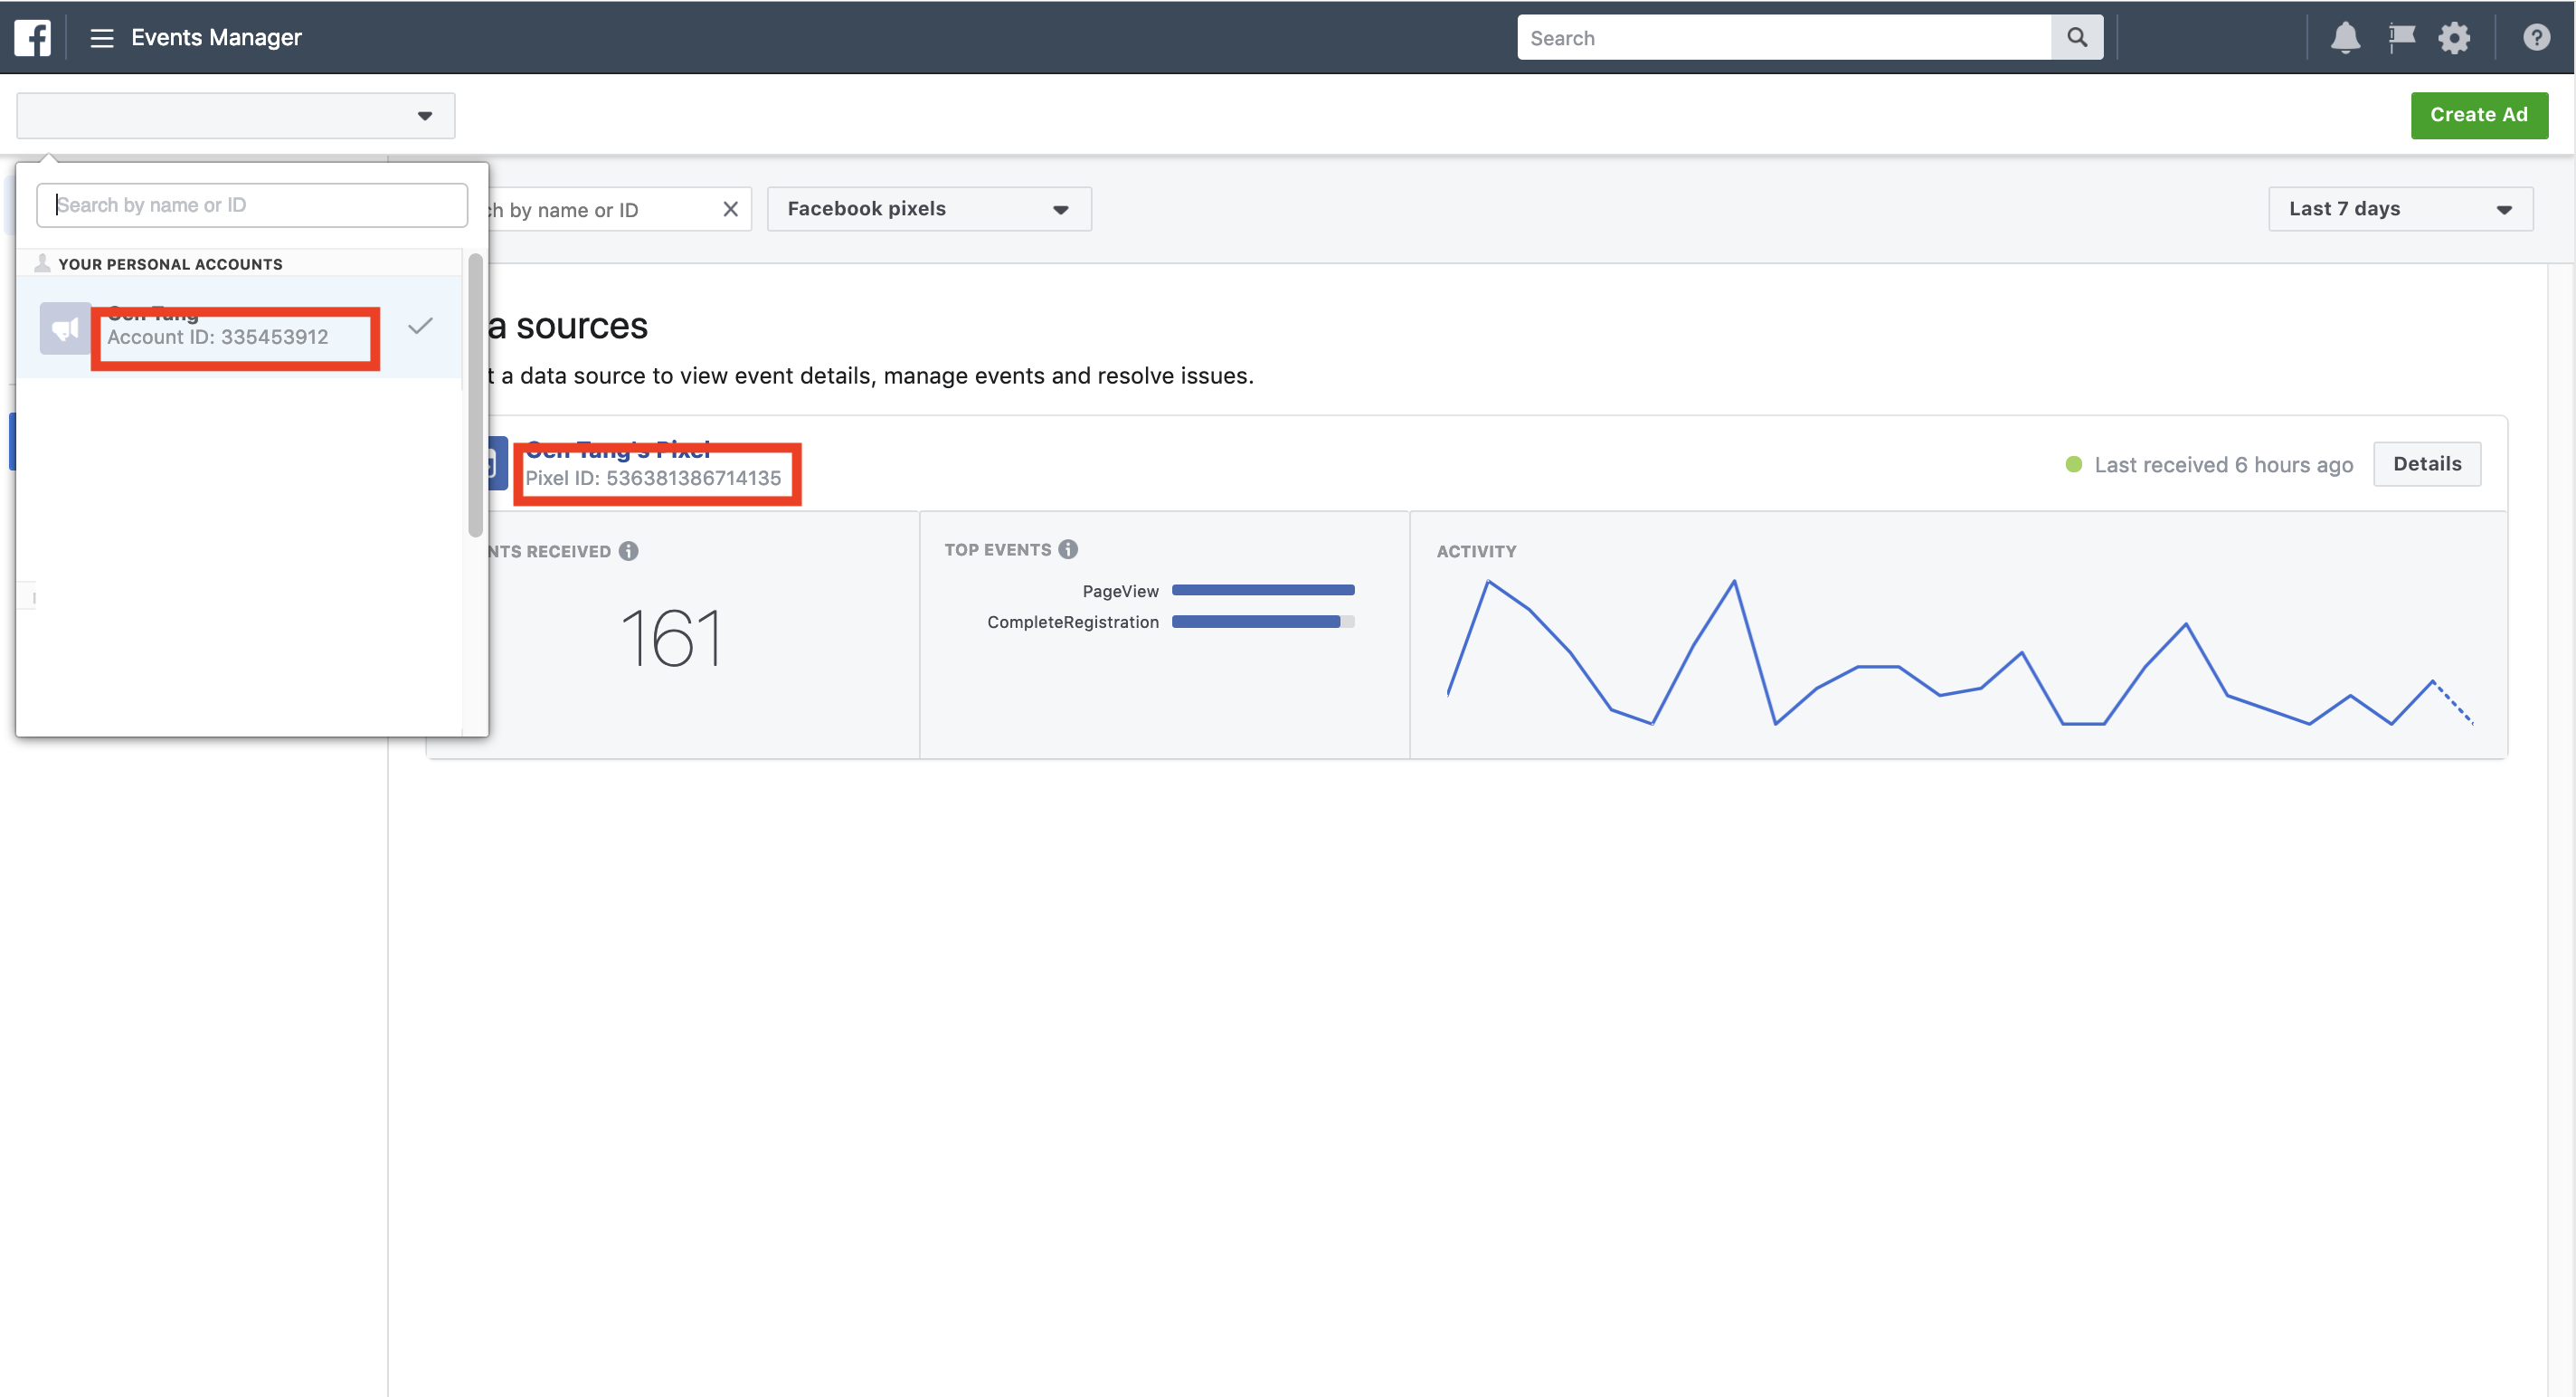
4. Select the Ad Account you want Diamond Digital Marketing to manage in the upper left drop down menu bar. You can see the Ad Account ID inside the drop down menu bar as well.
5. The Pixel ID is inside the selected Ad Account.
6. Done
